Whenever we take the plants or the foreign objects to the market, people always ask “What is it???”
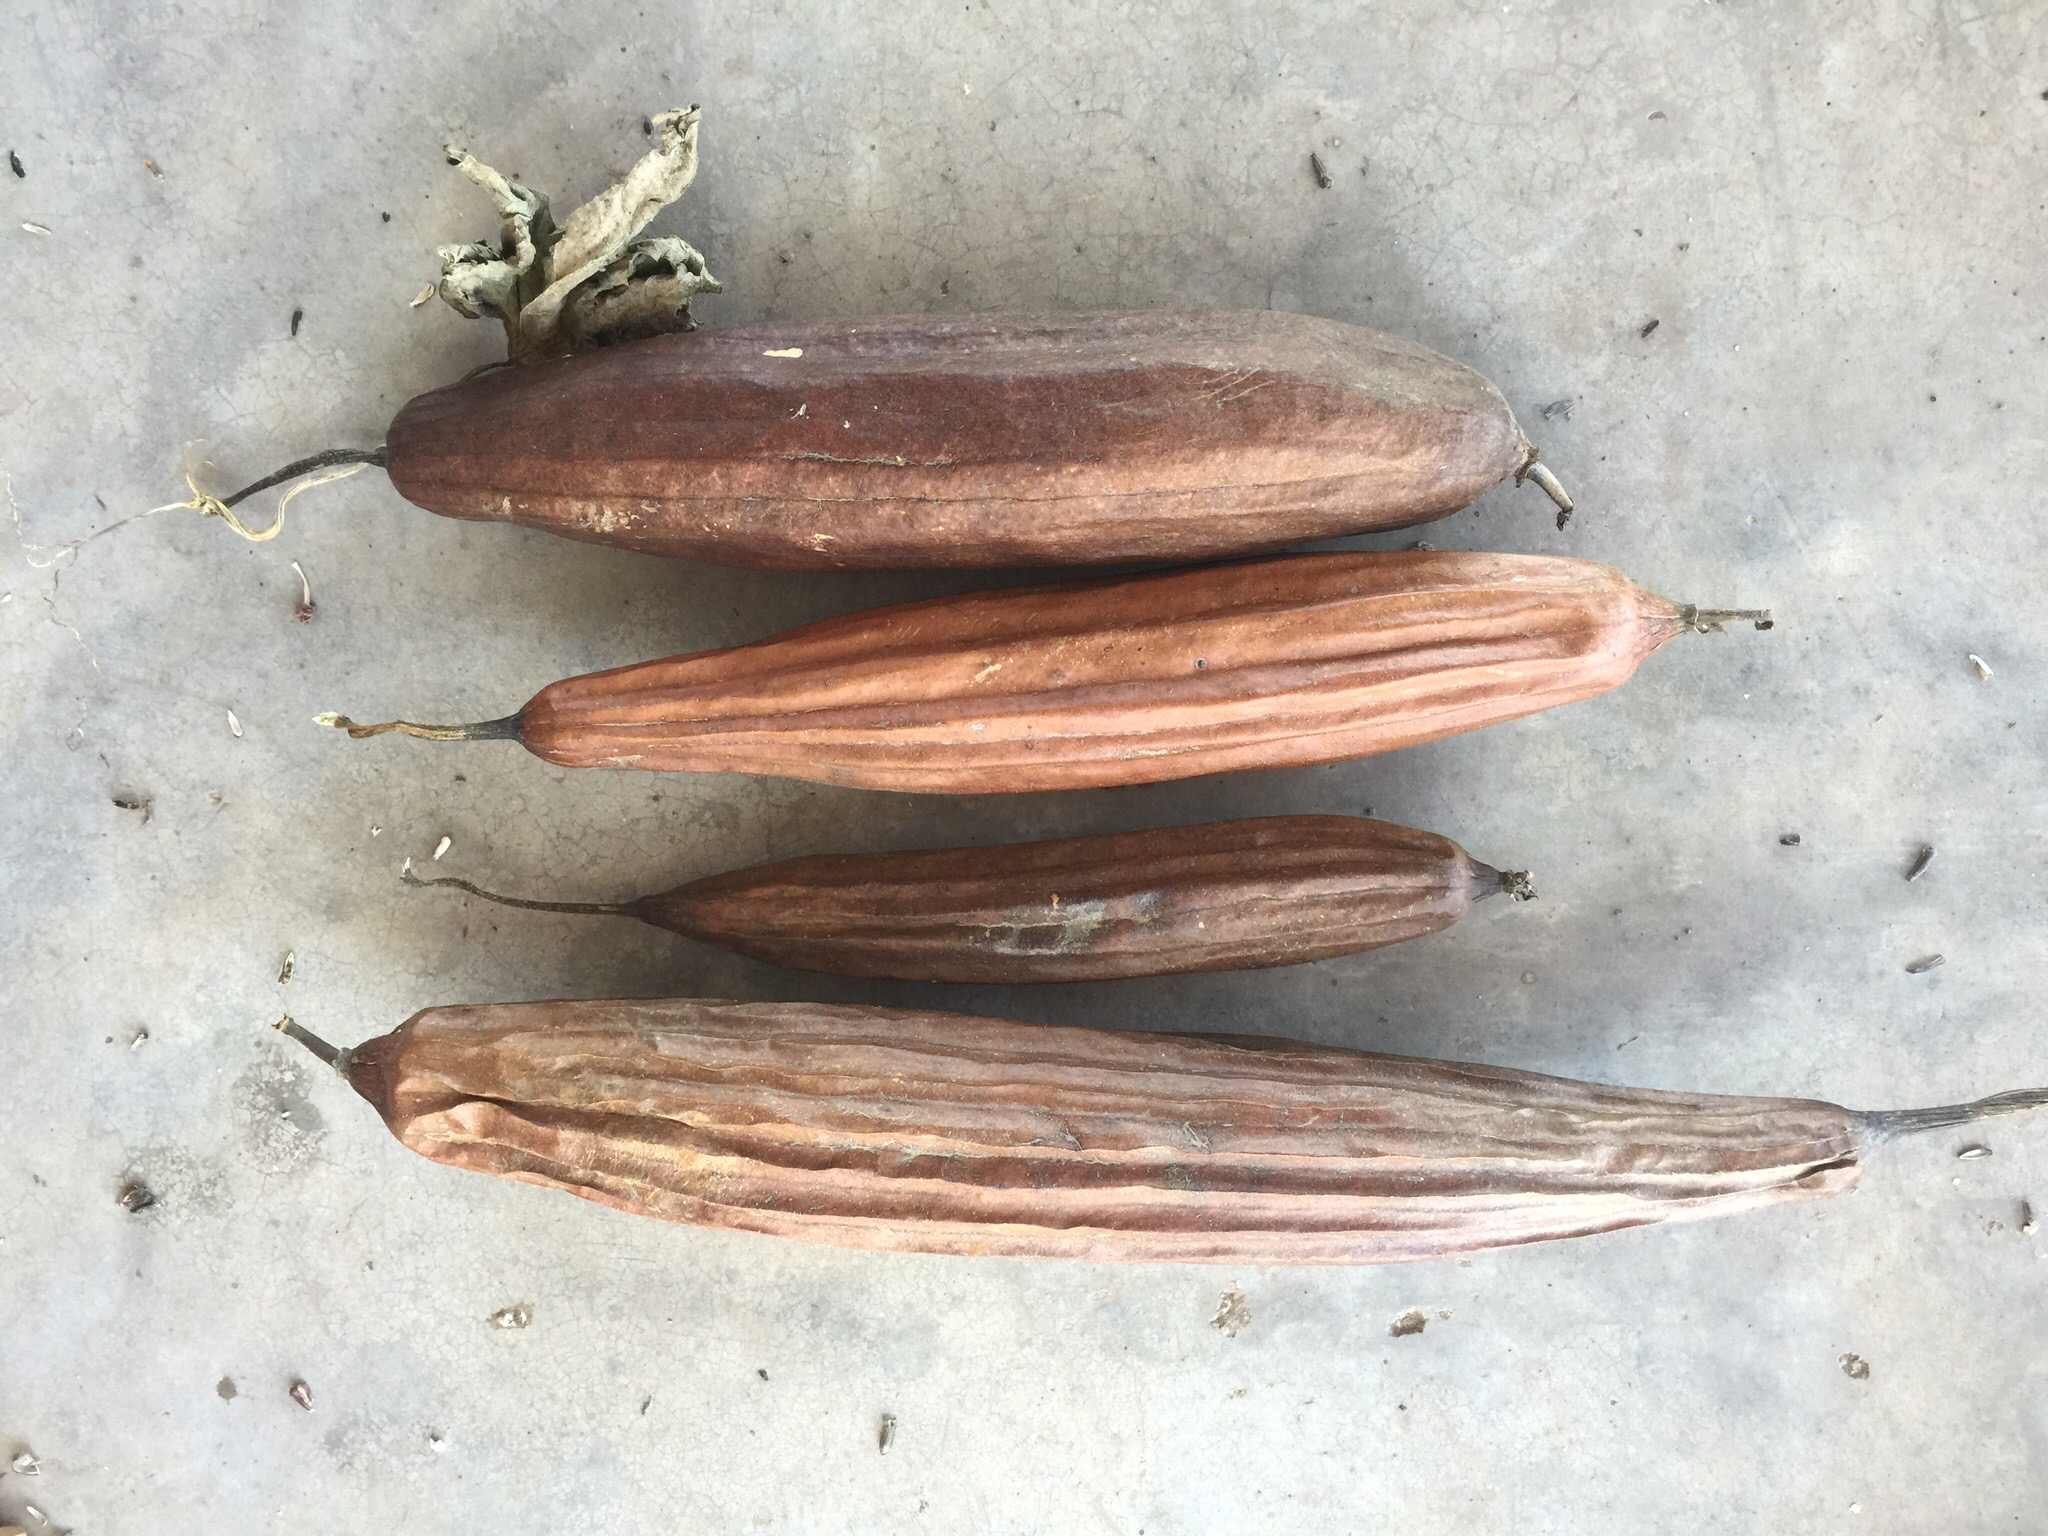
Well it is a loofah plant that produces loofahs. “What is a loofah” you ask? Well you know those sponge looking things you use in the shower to scrub off dead skin? That’s a loofah! AND they grow on a plant!
The plant is a vining plant – loves the heat – and has properties like a gourd. There are beautiful yellow flowers and long gourd type things that come down that look like cucumbers.
They water like squash, but are pretty hardy to hot weather. They don’t require too much water.
Once they dry on the vine, they turn out to be a shell.
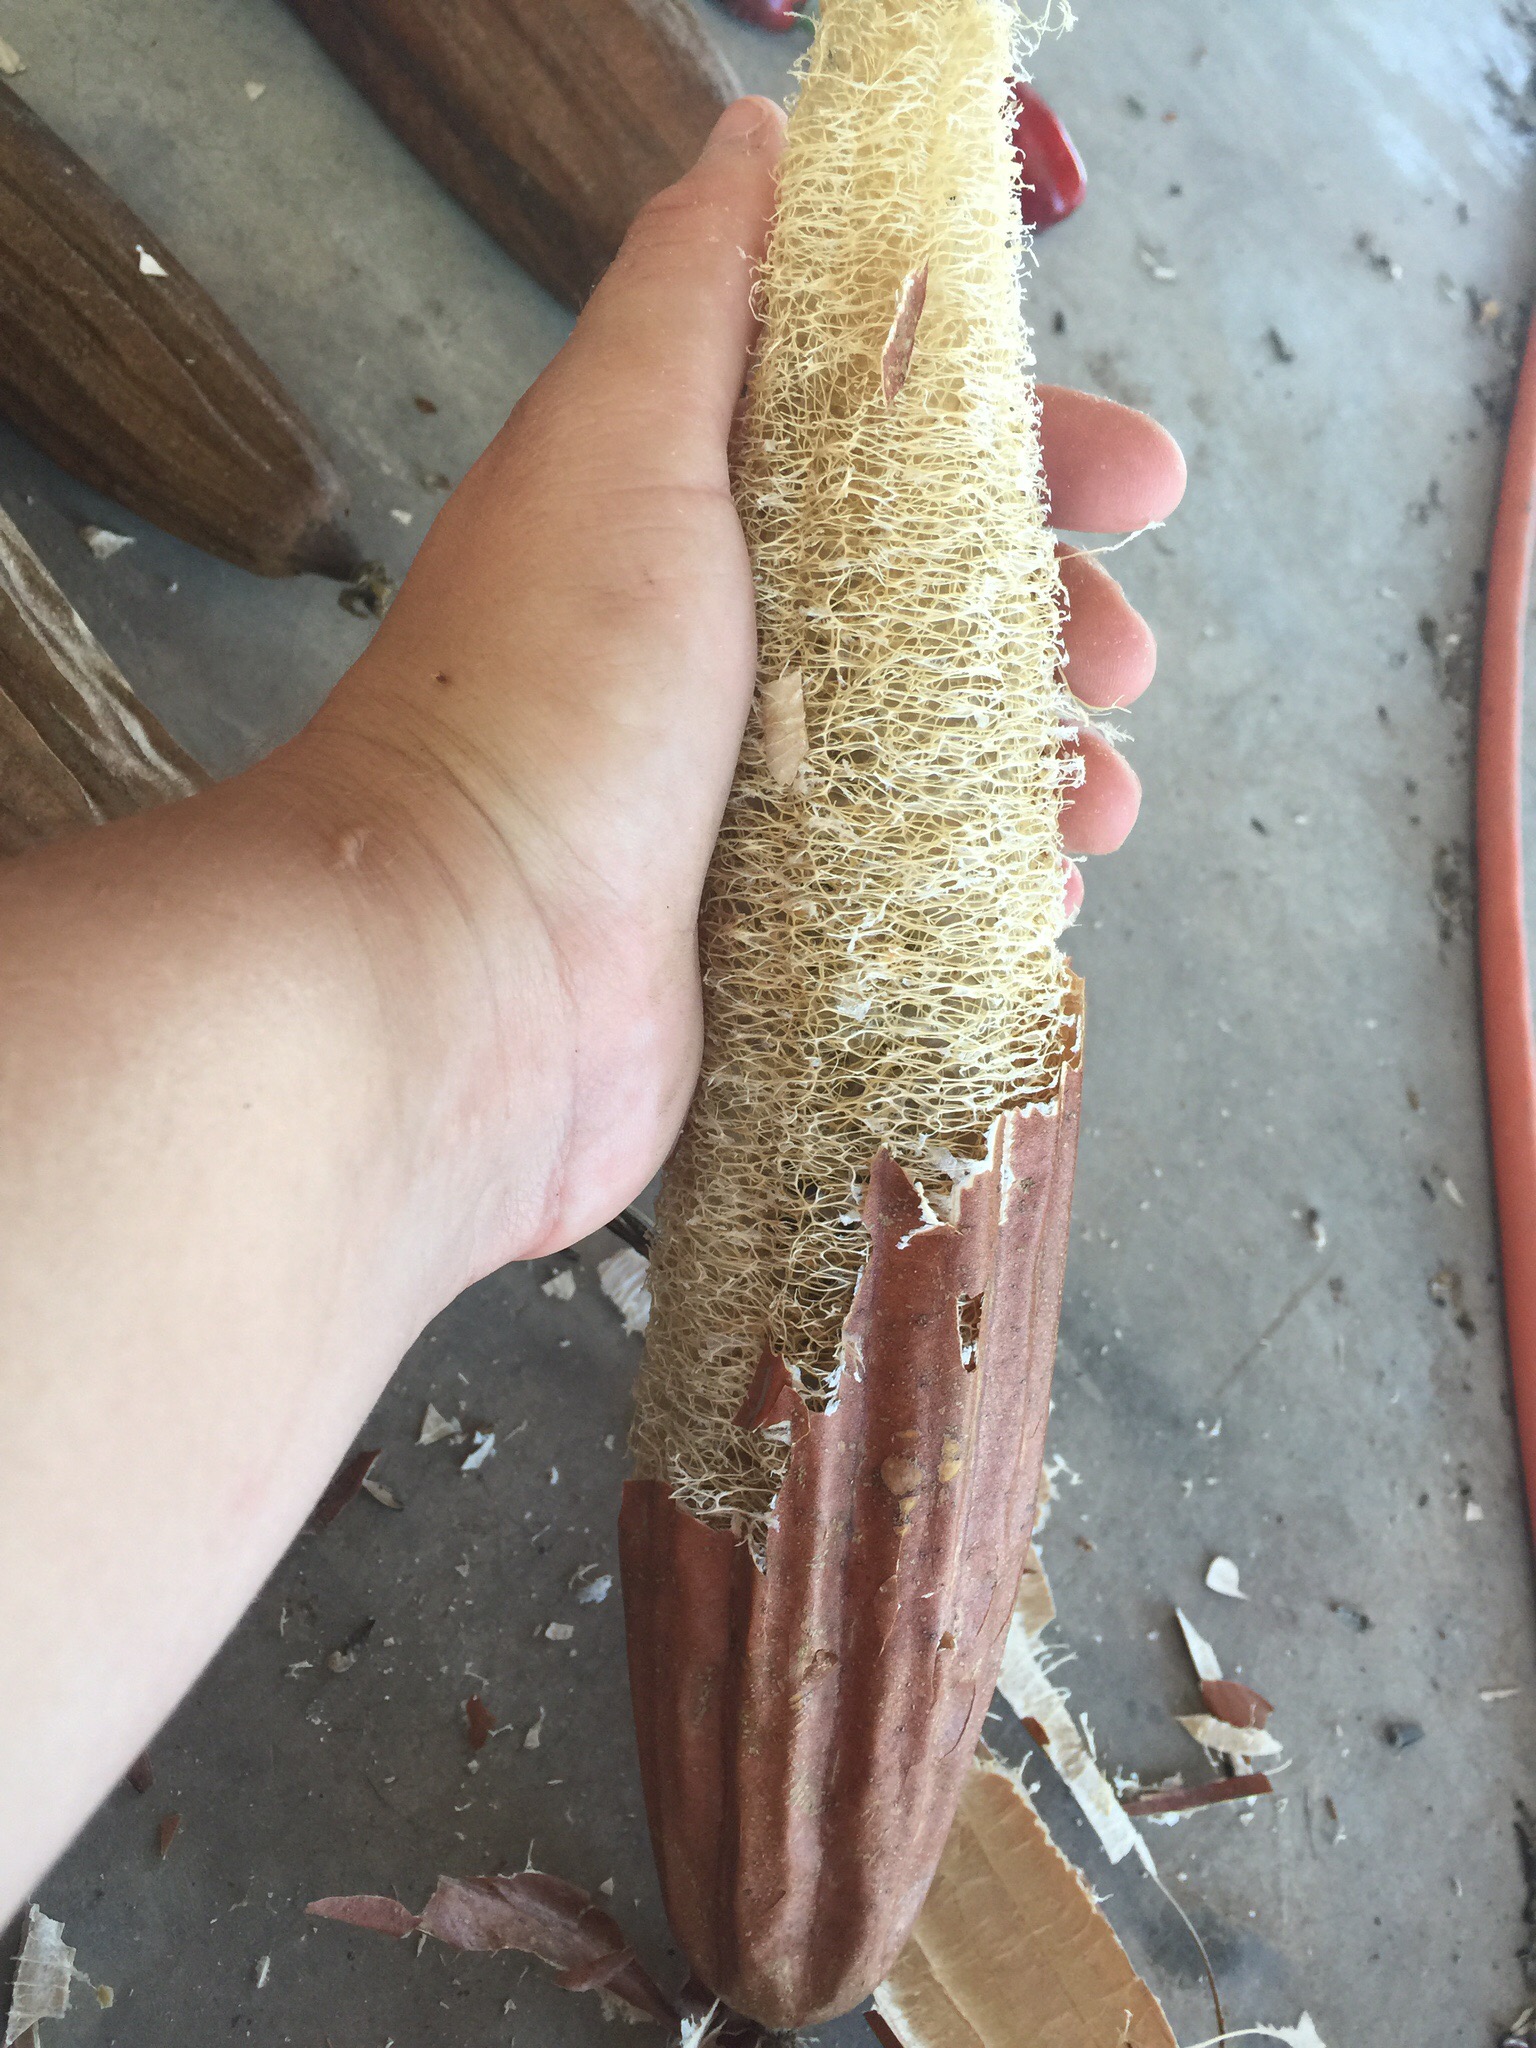
Then you peel off the shell through the membranes and underneith is the loofah.
Shake it to one end and the seeds are in the inside!
You then have seeds for next year and a scrubby loofah for the shower! You can do all sorts of arts/crafts with it including putting soap in the middle.
And that ladies and gentlemen is what a loofah is!
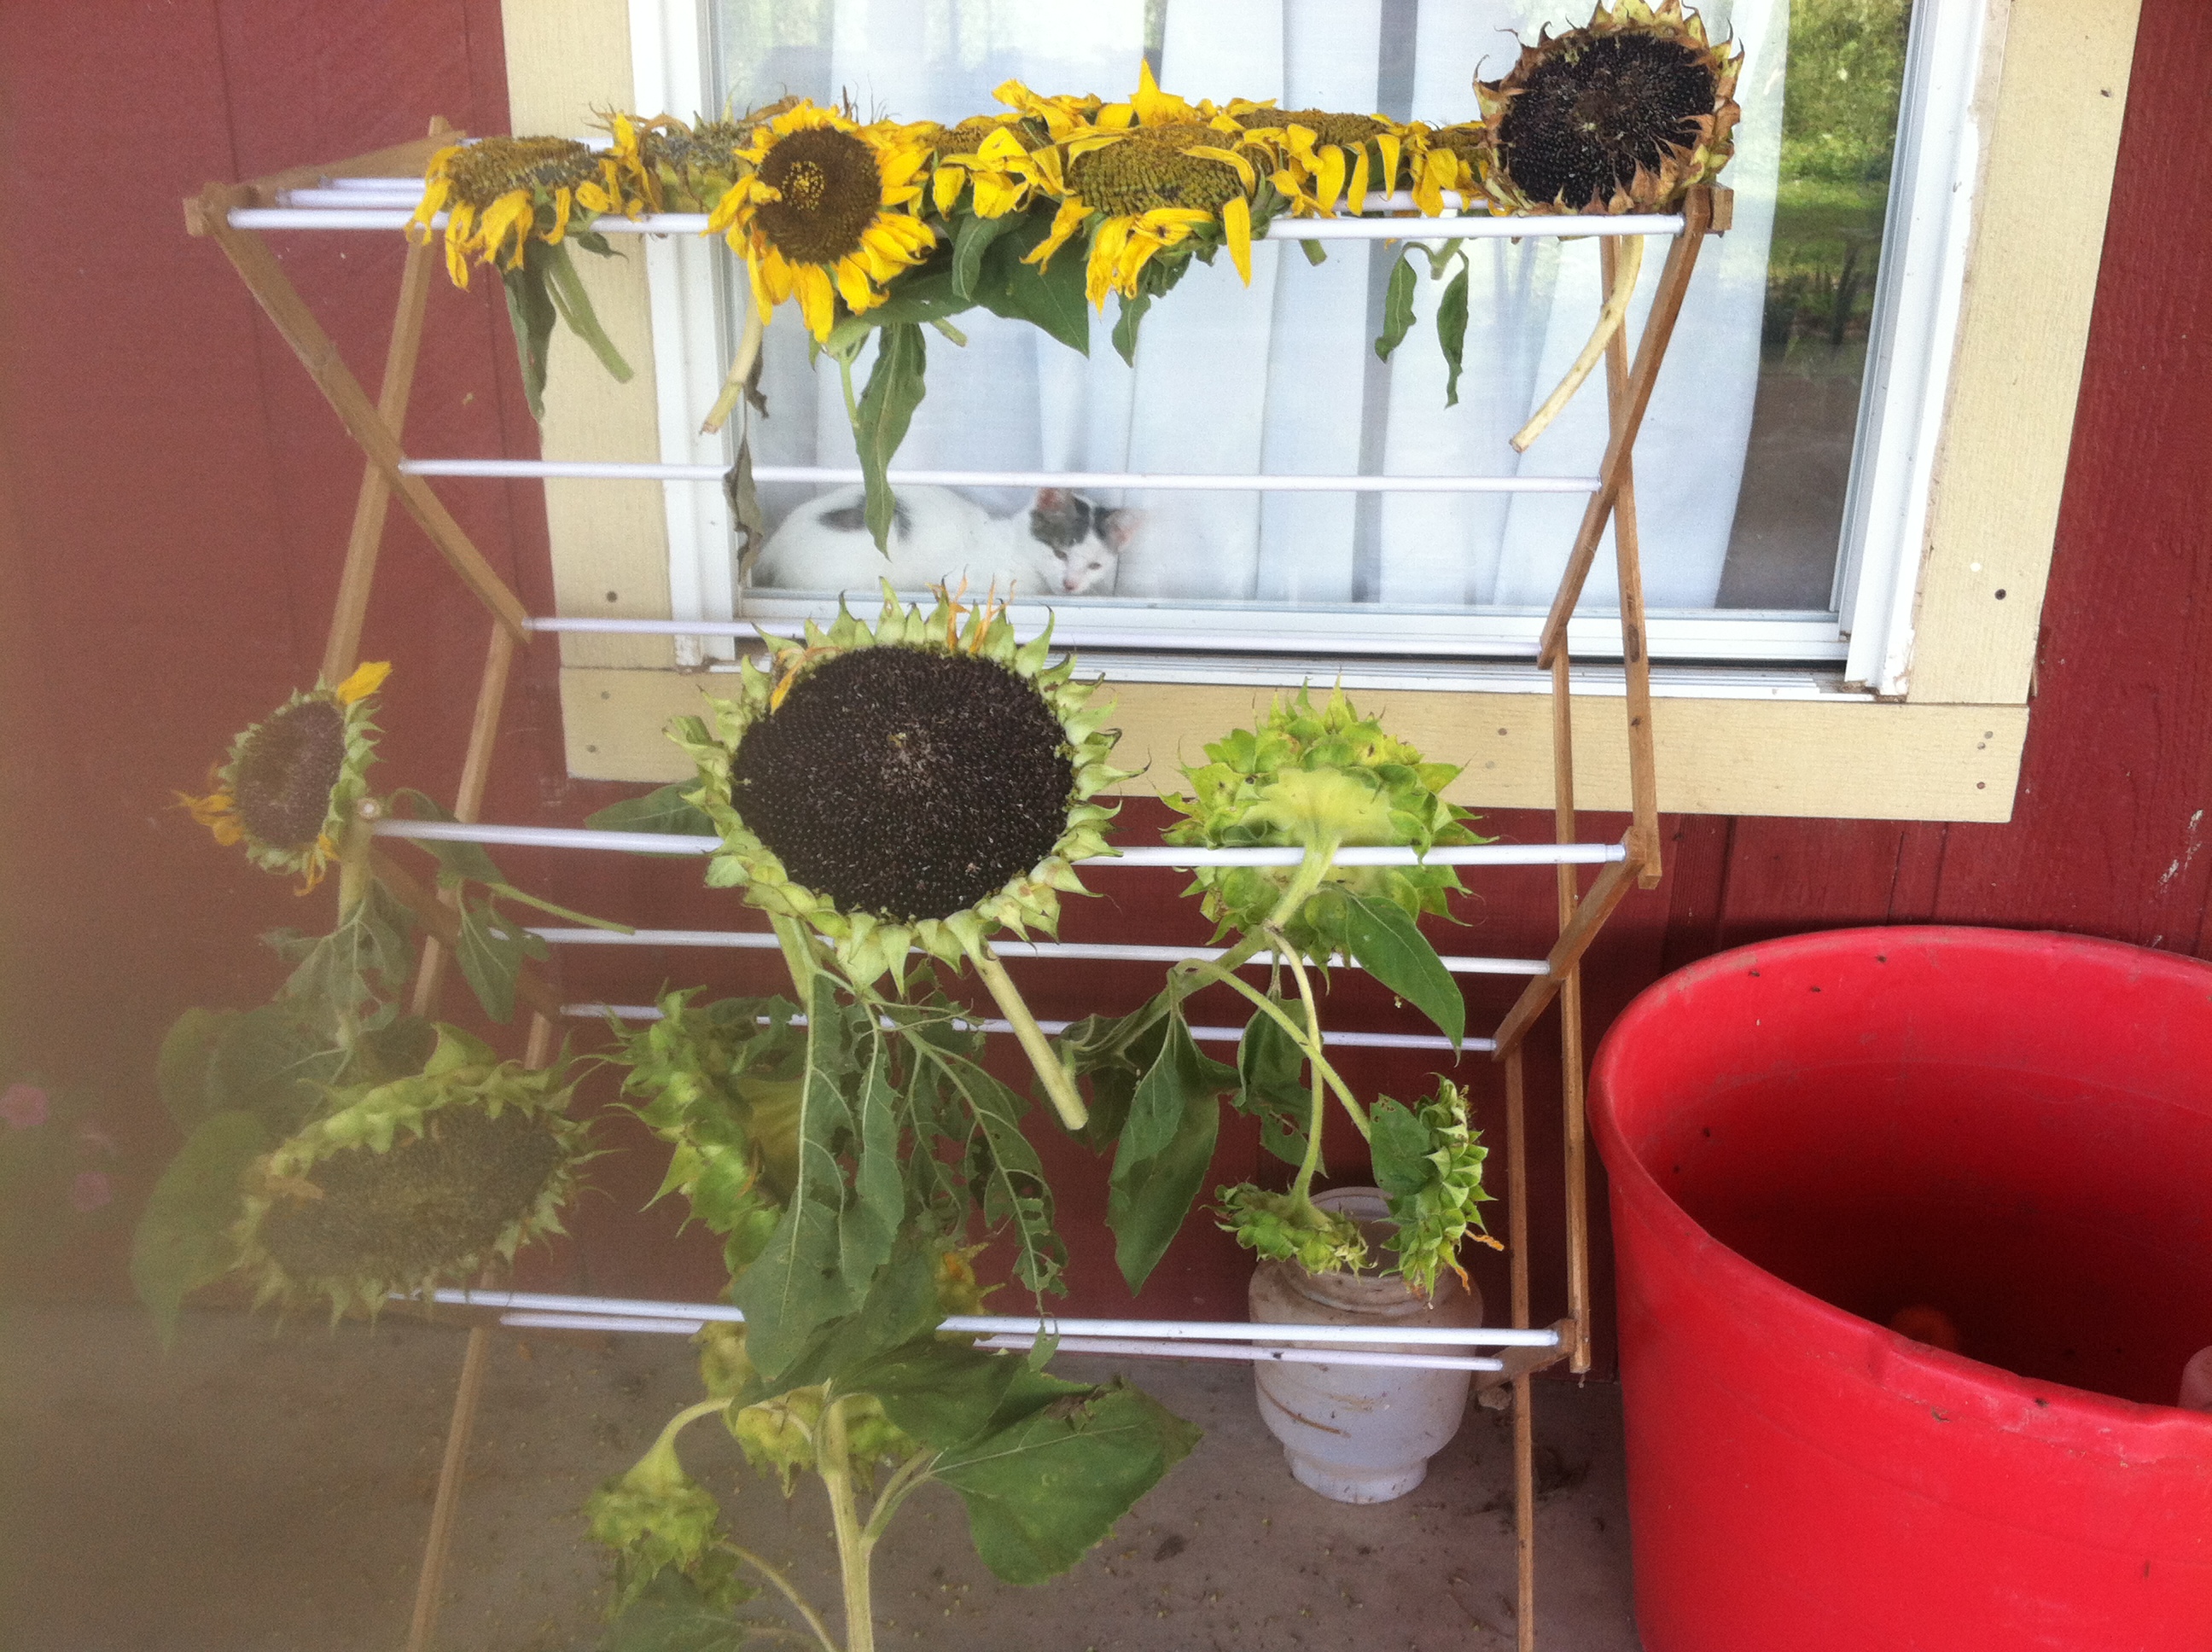
I love sunflowers so much. To me, they symbolize the start of Summer and the harvest of Fall. The bright yellow to orange or red color always lights up people’s faces at the market. Some like to grow and keep them in the garden, others like to cut them for fresh flowers. We do both!
This year we had close to 100 sunflowers in the garden. It will be the third year of drying, saving, and planting our own seeds from the original seeds. Seed saving is so easy and your initial investment of the first seeds is the only money you would spend. The joy of saving is that you also can not predict what will come of your seeds. Sometimes they cross-pollinate and become a whole different variety. You can notice that the flower color you planted is not the same color the next year- or one year the flower is huge and the next it has lots of little ones. This year we had a new variety that made the flower a neon yellow color when the year before they were all dark yellow. Sometimes some of your seeds just won’t produce. You never know what you’re going to get!
It is super easy to save seeds. Below are the steps with pictures:
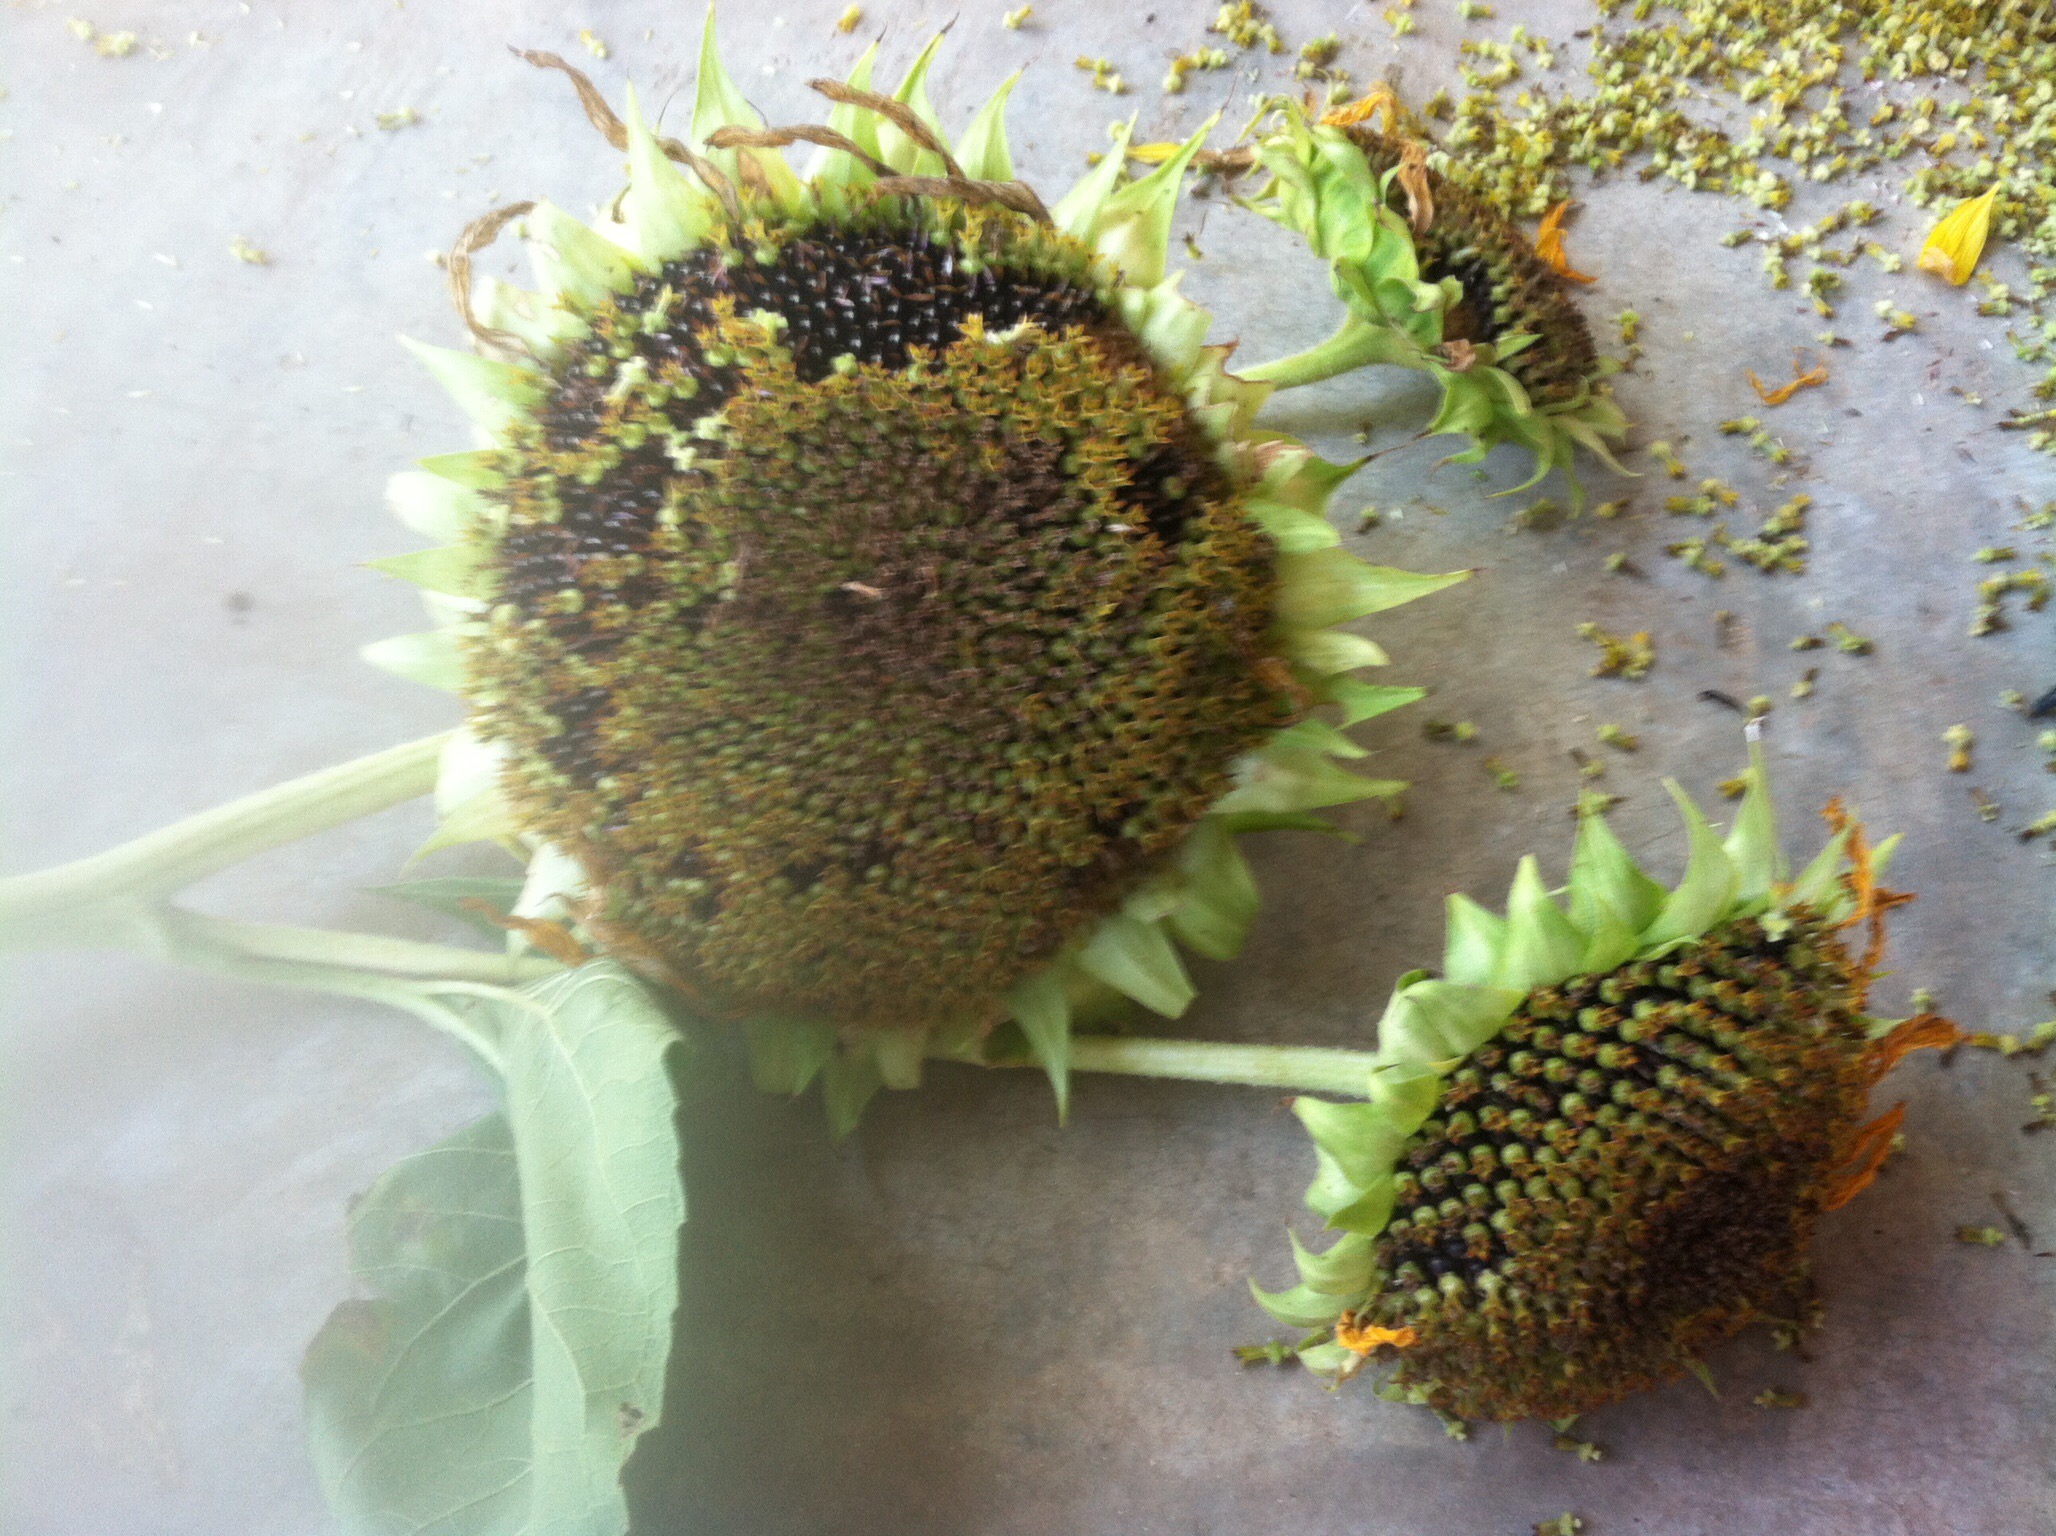
First, you should select your Sunflowers from your garden. Once your flowers have sprung from the ground and delighted your days, they will become almost wilted. They will loose their flowers and pollen holders and droop over on the stalk. This is when the oportune time is to start drying your seeds. Some people leave them on the plant to dry, but usually pests and birds get to them before you can harvest!
When you look at your flowers, make sure you can see the seeds – undeveloped seeds will not produce and the seed head will get moldy. They should look like the two pictures below:
Has the pollen pockets still on, wilted petals.Two different drying lengths – one on left is less dry.
The birds got to this one:
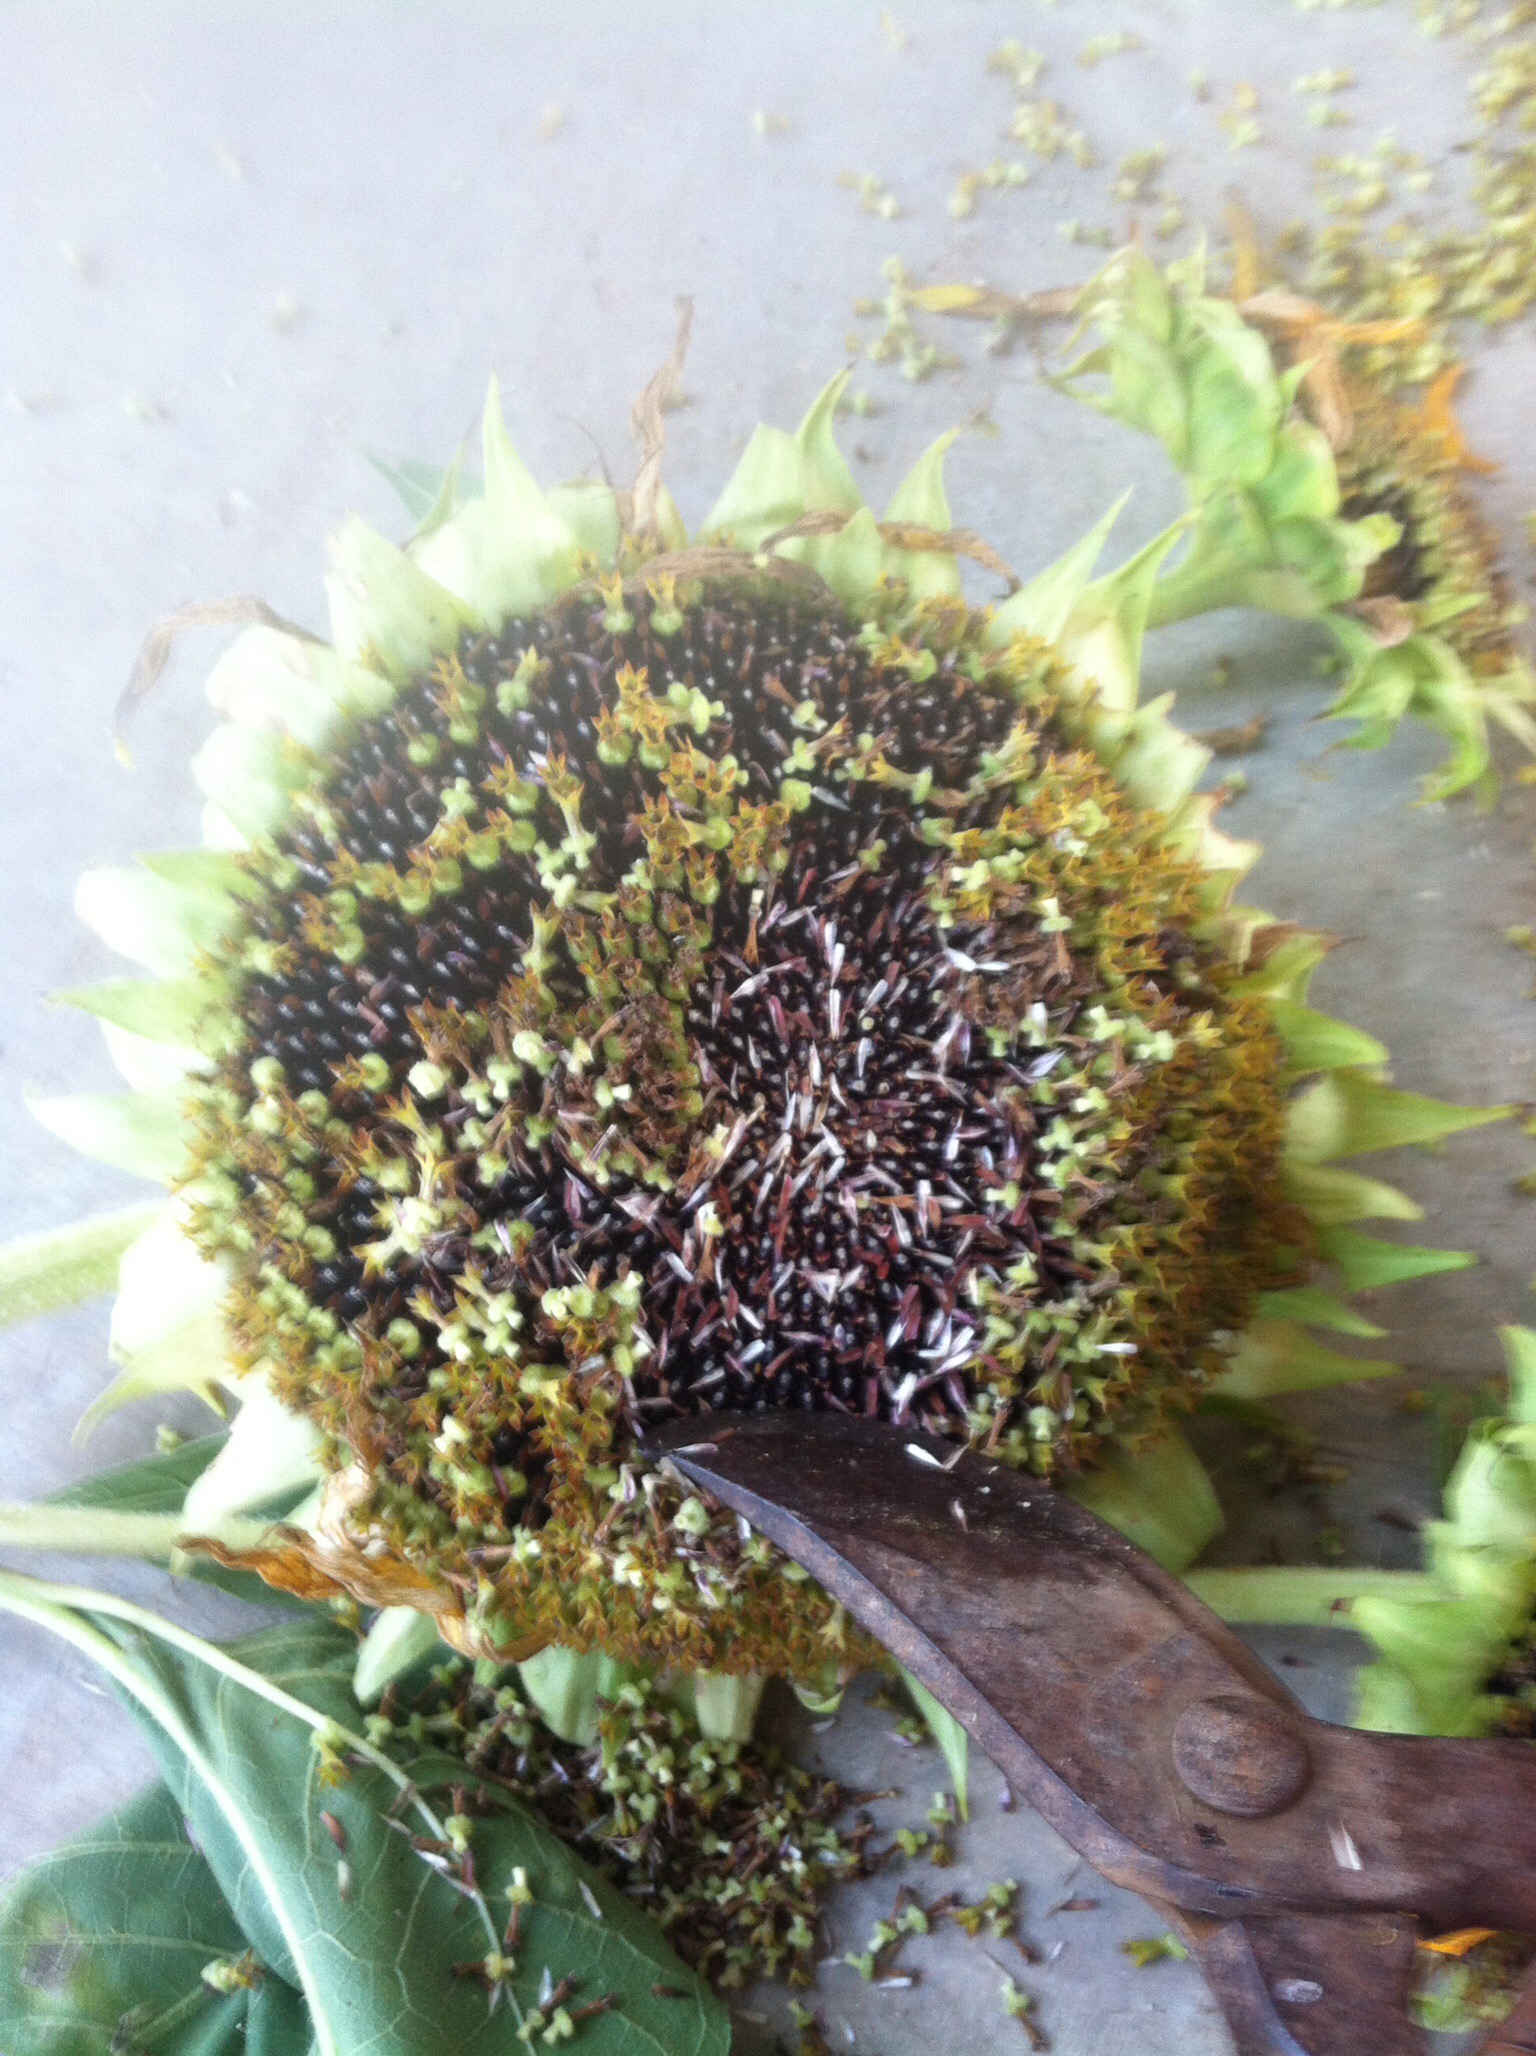
Once you select your seed heads, cut off to where you have some of the stalk left. Take your cutting tool or your fingers and strip off the pollen buds:
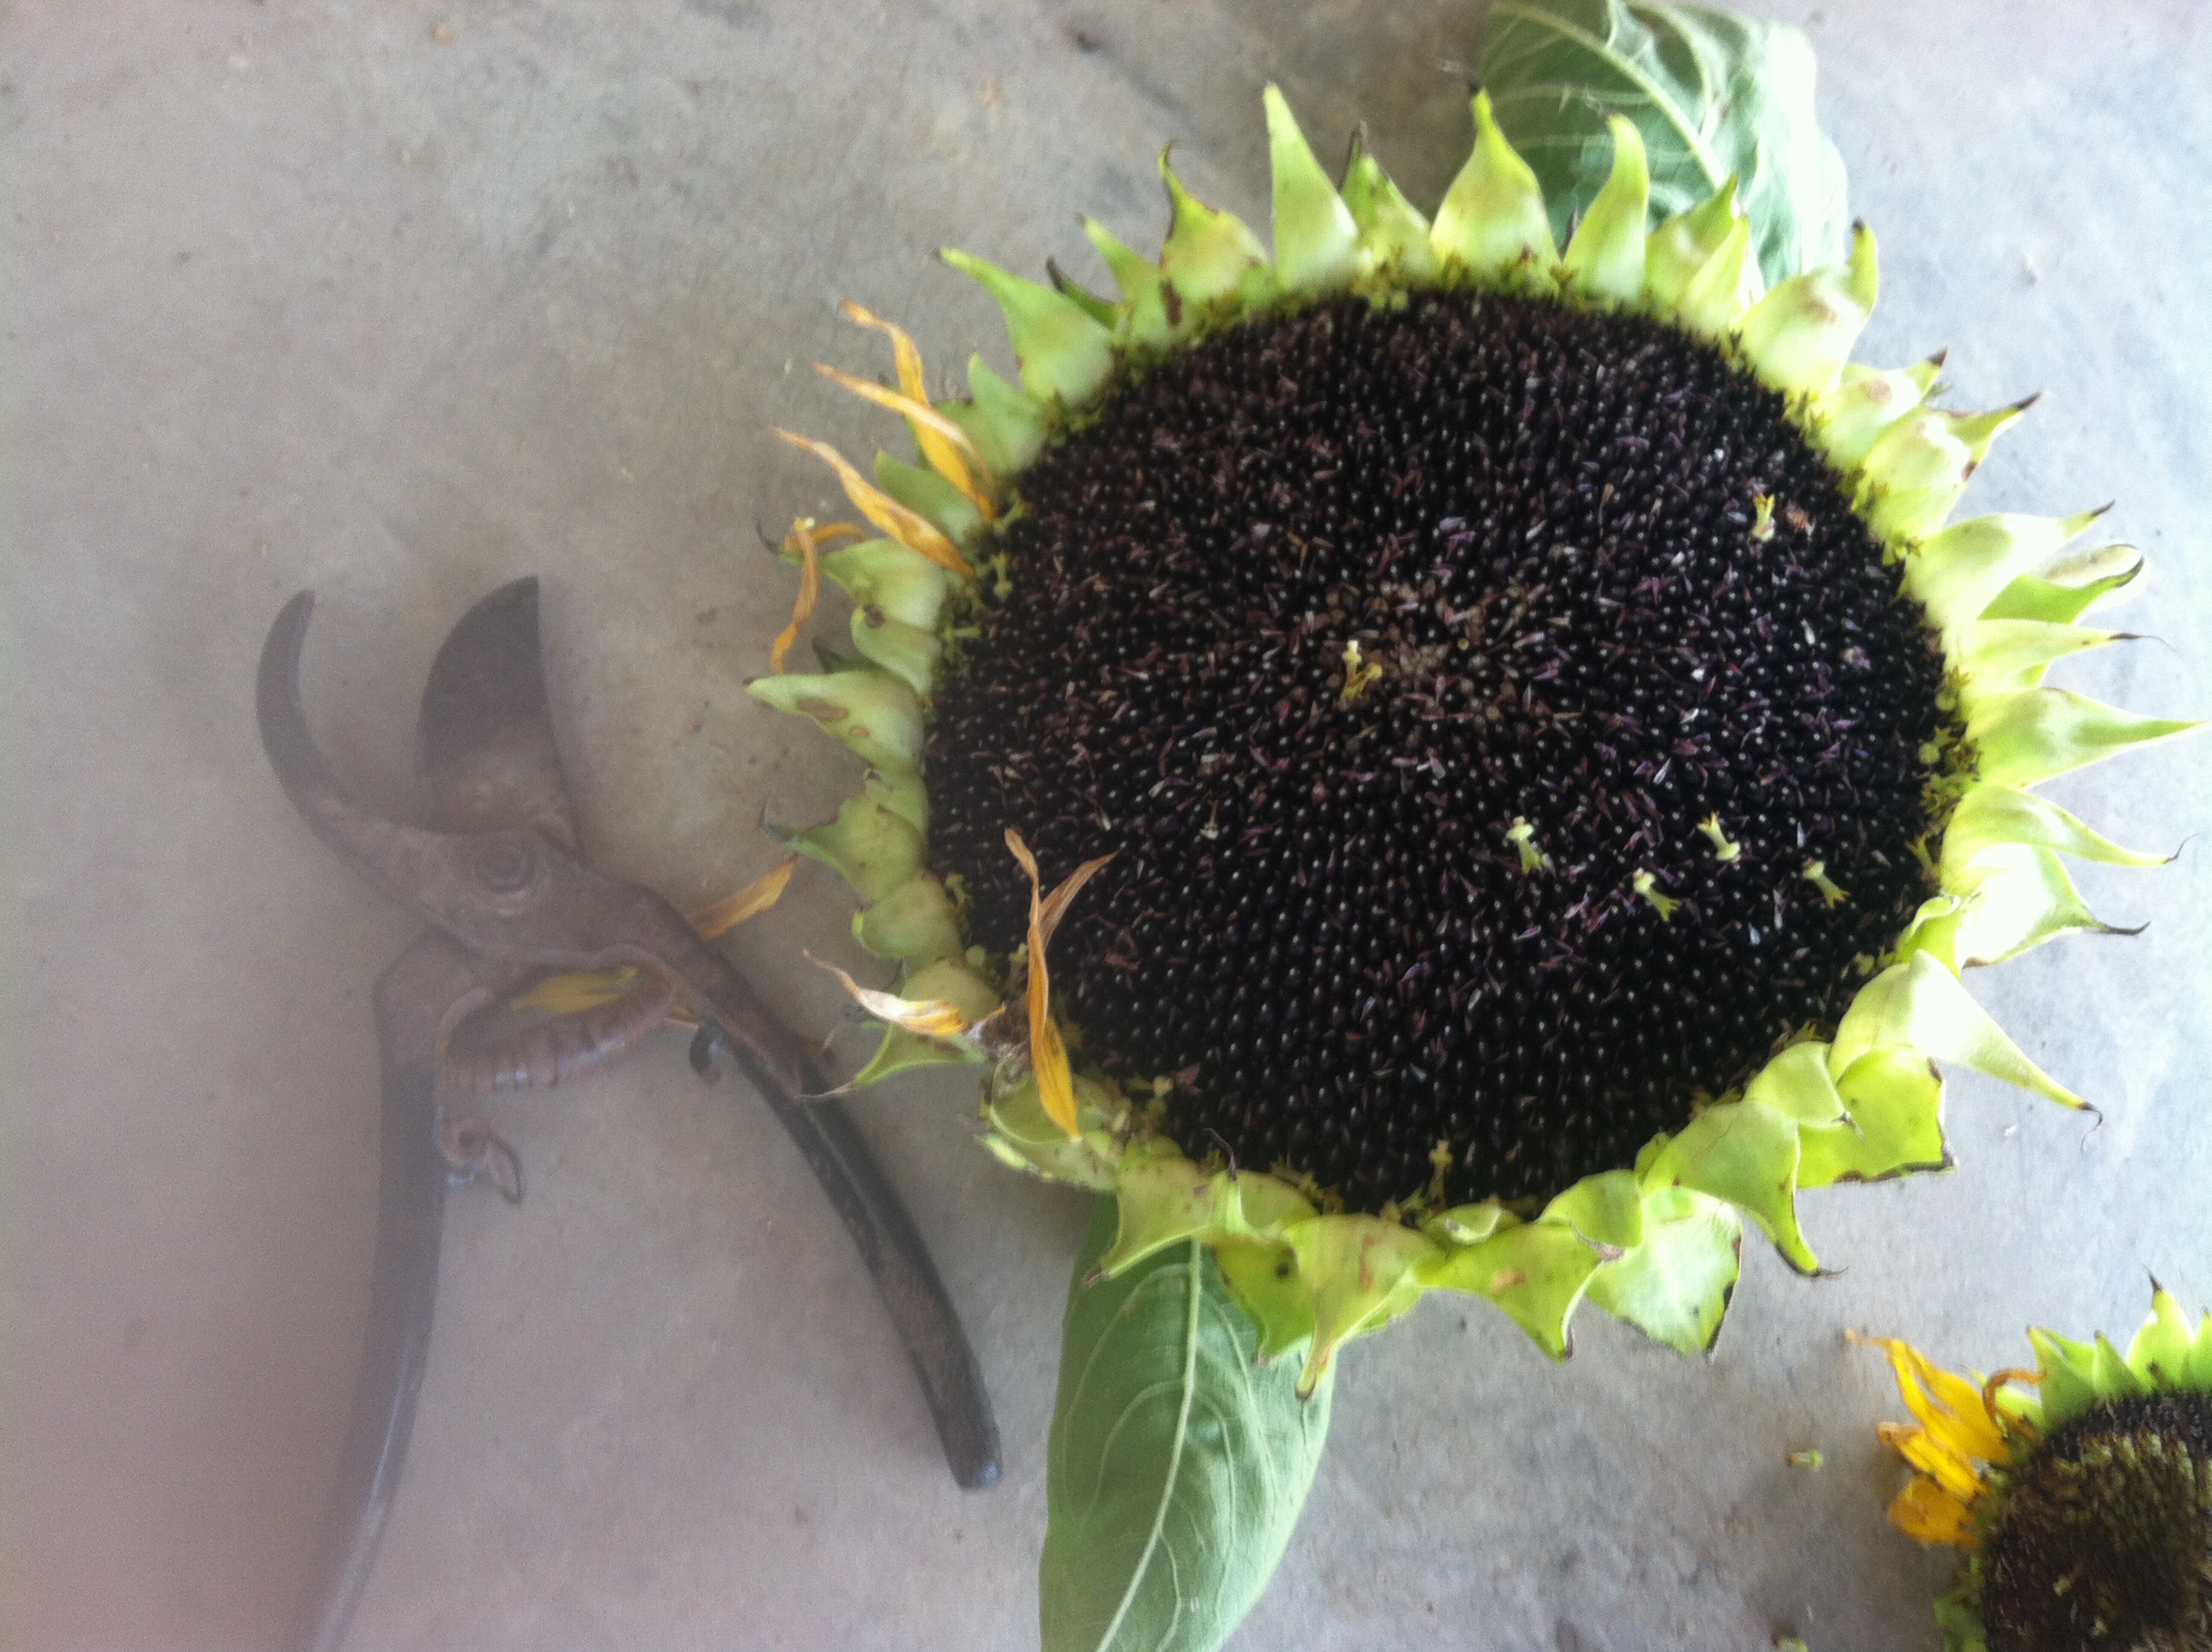
The end result should look like this:
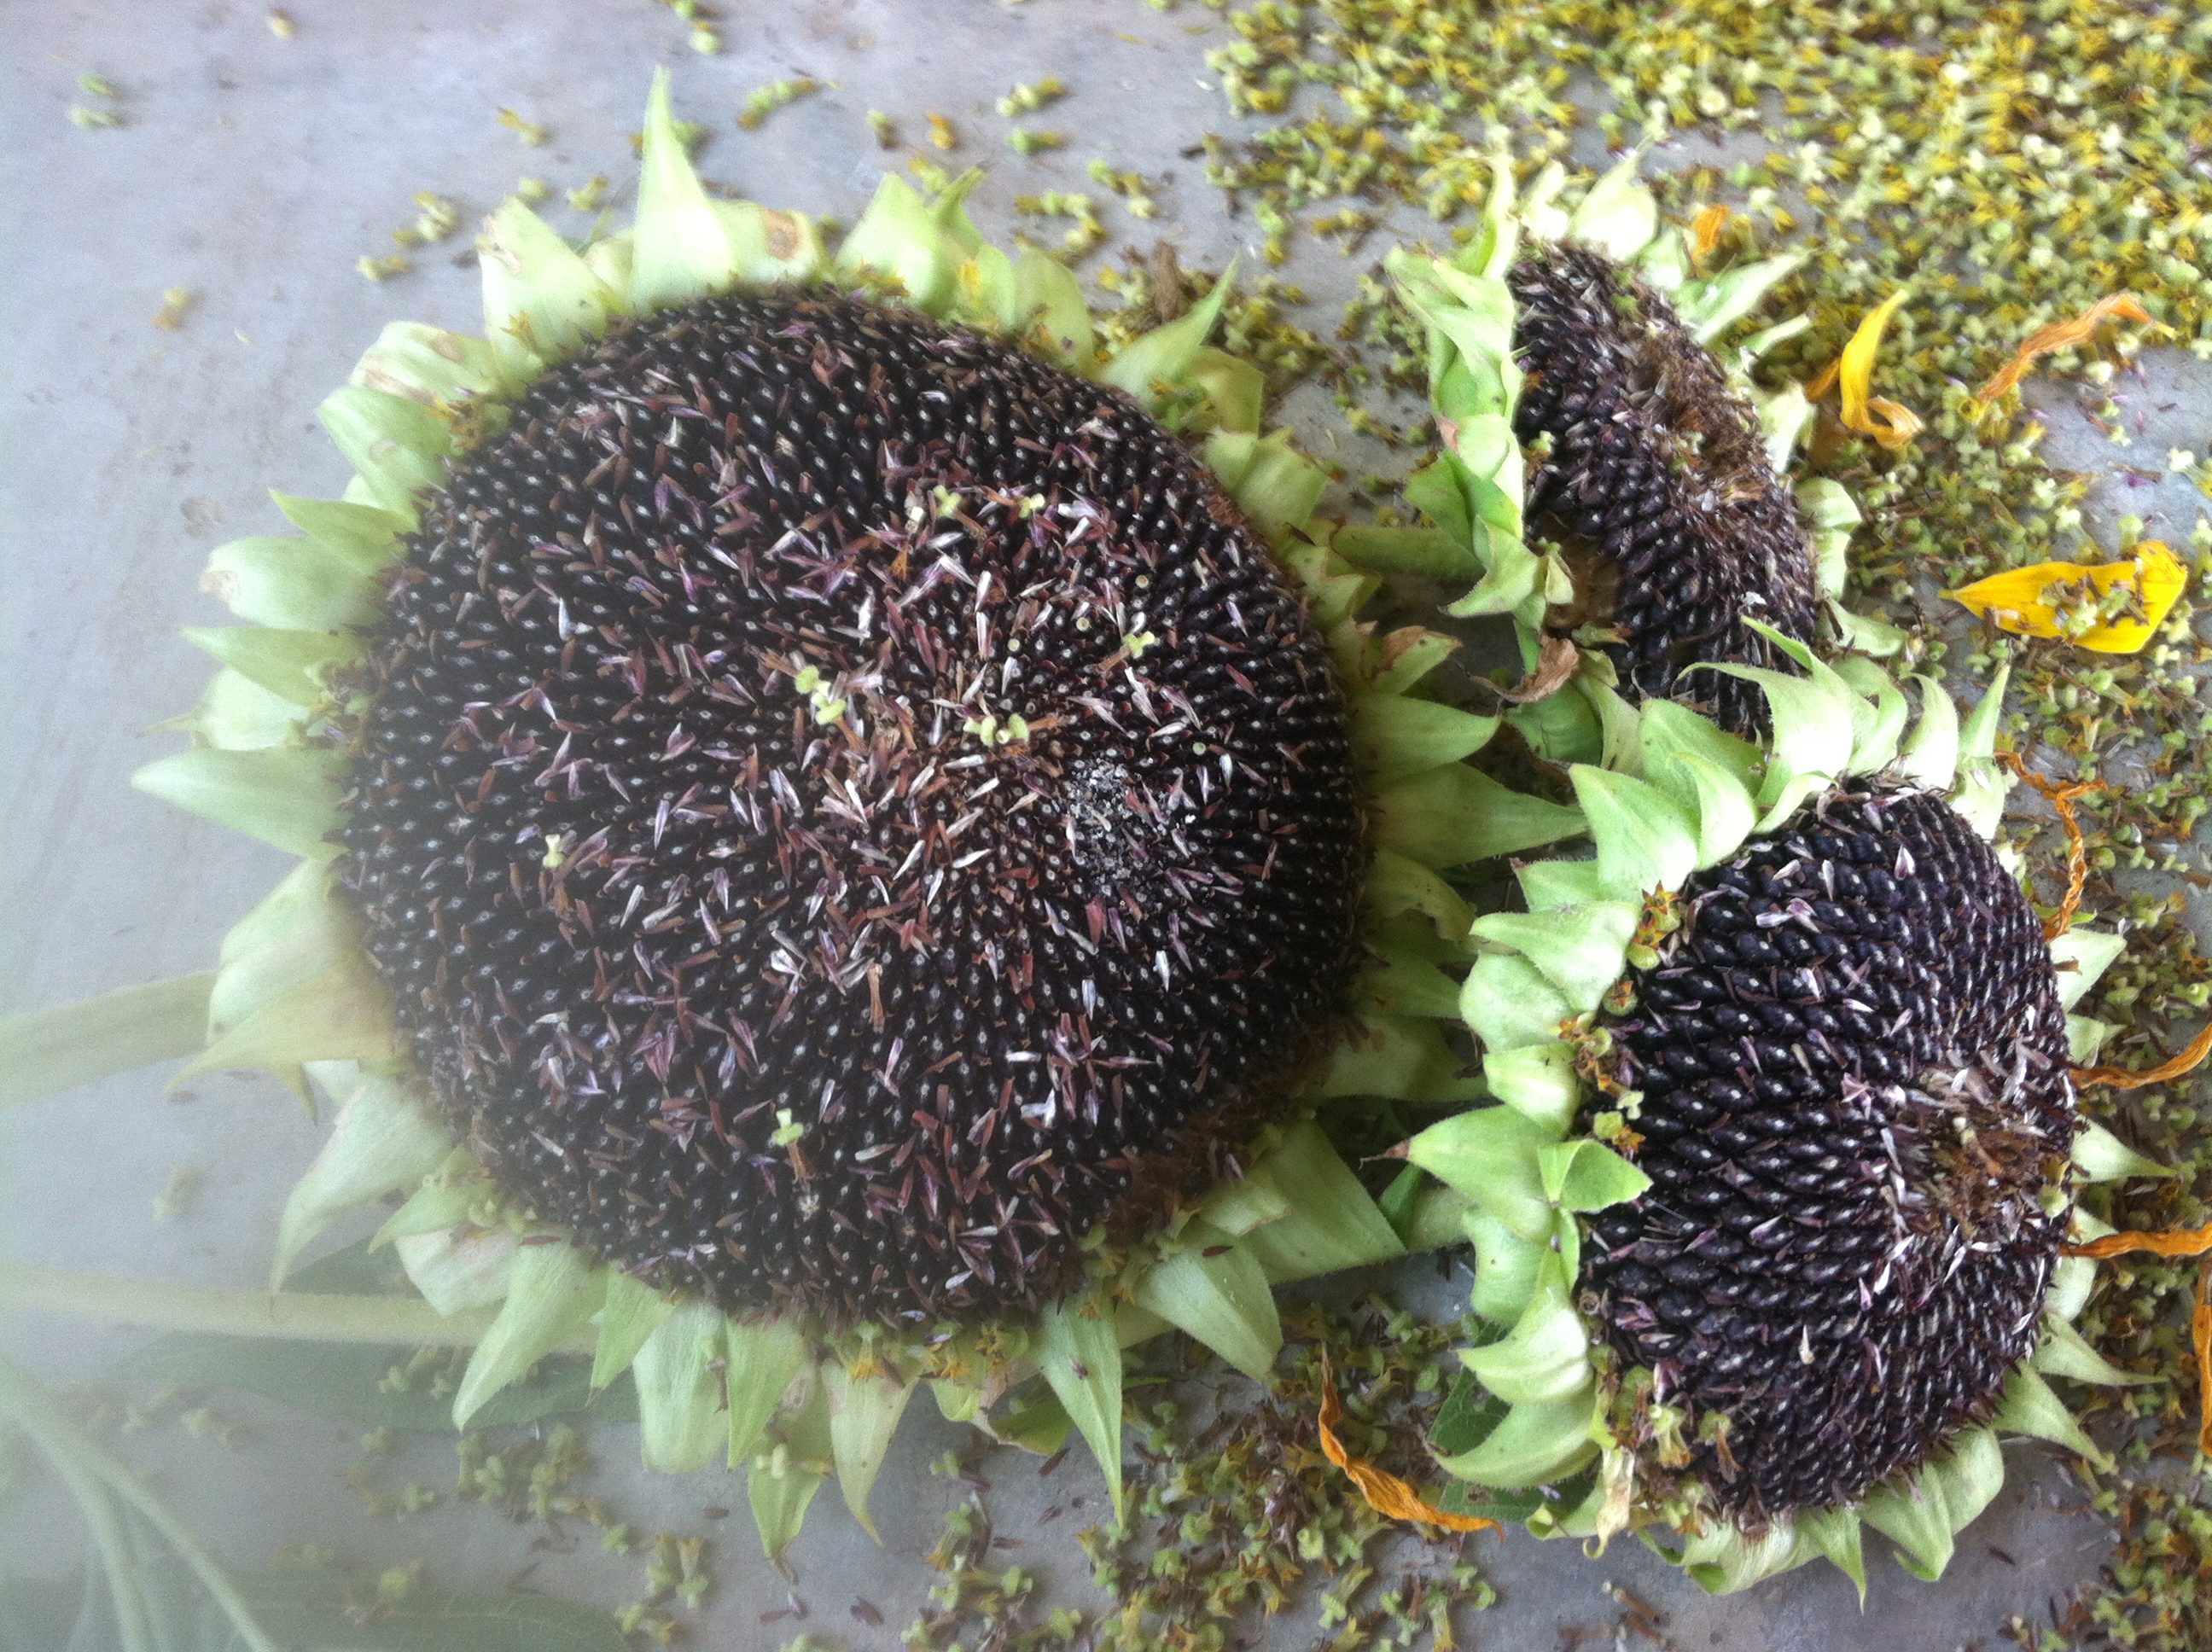
Take a rack or tie strings to the cut ends and hang heads to dry. Once dry, the green part of the head should be brown and crackly like the one on the top right on the rack.
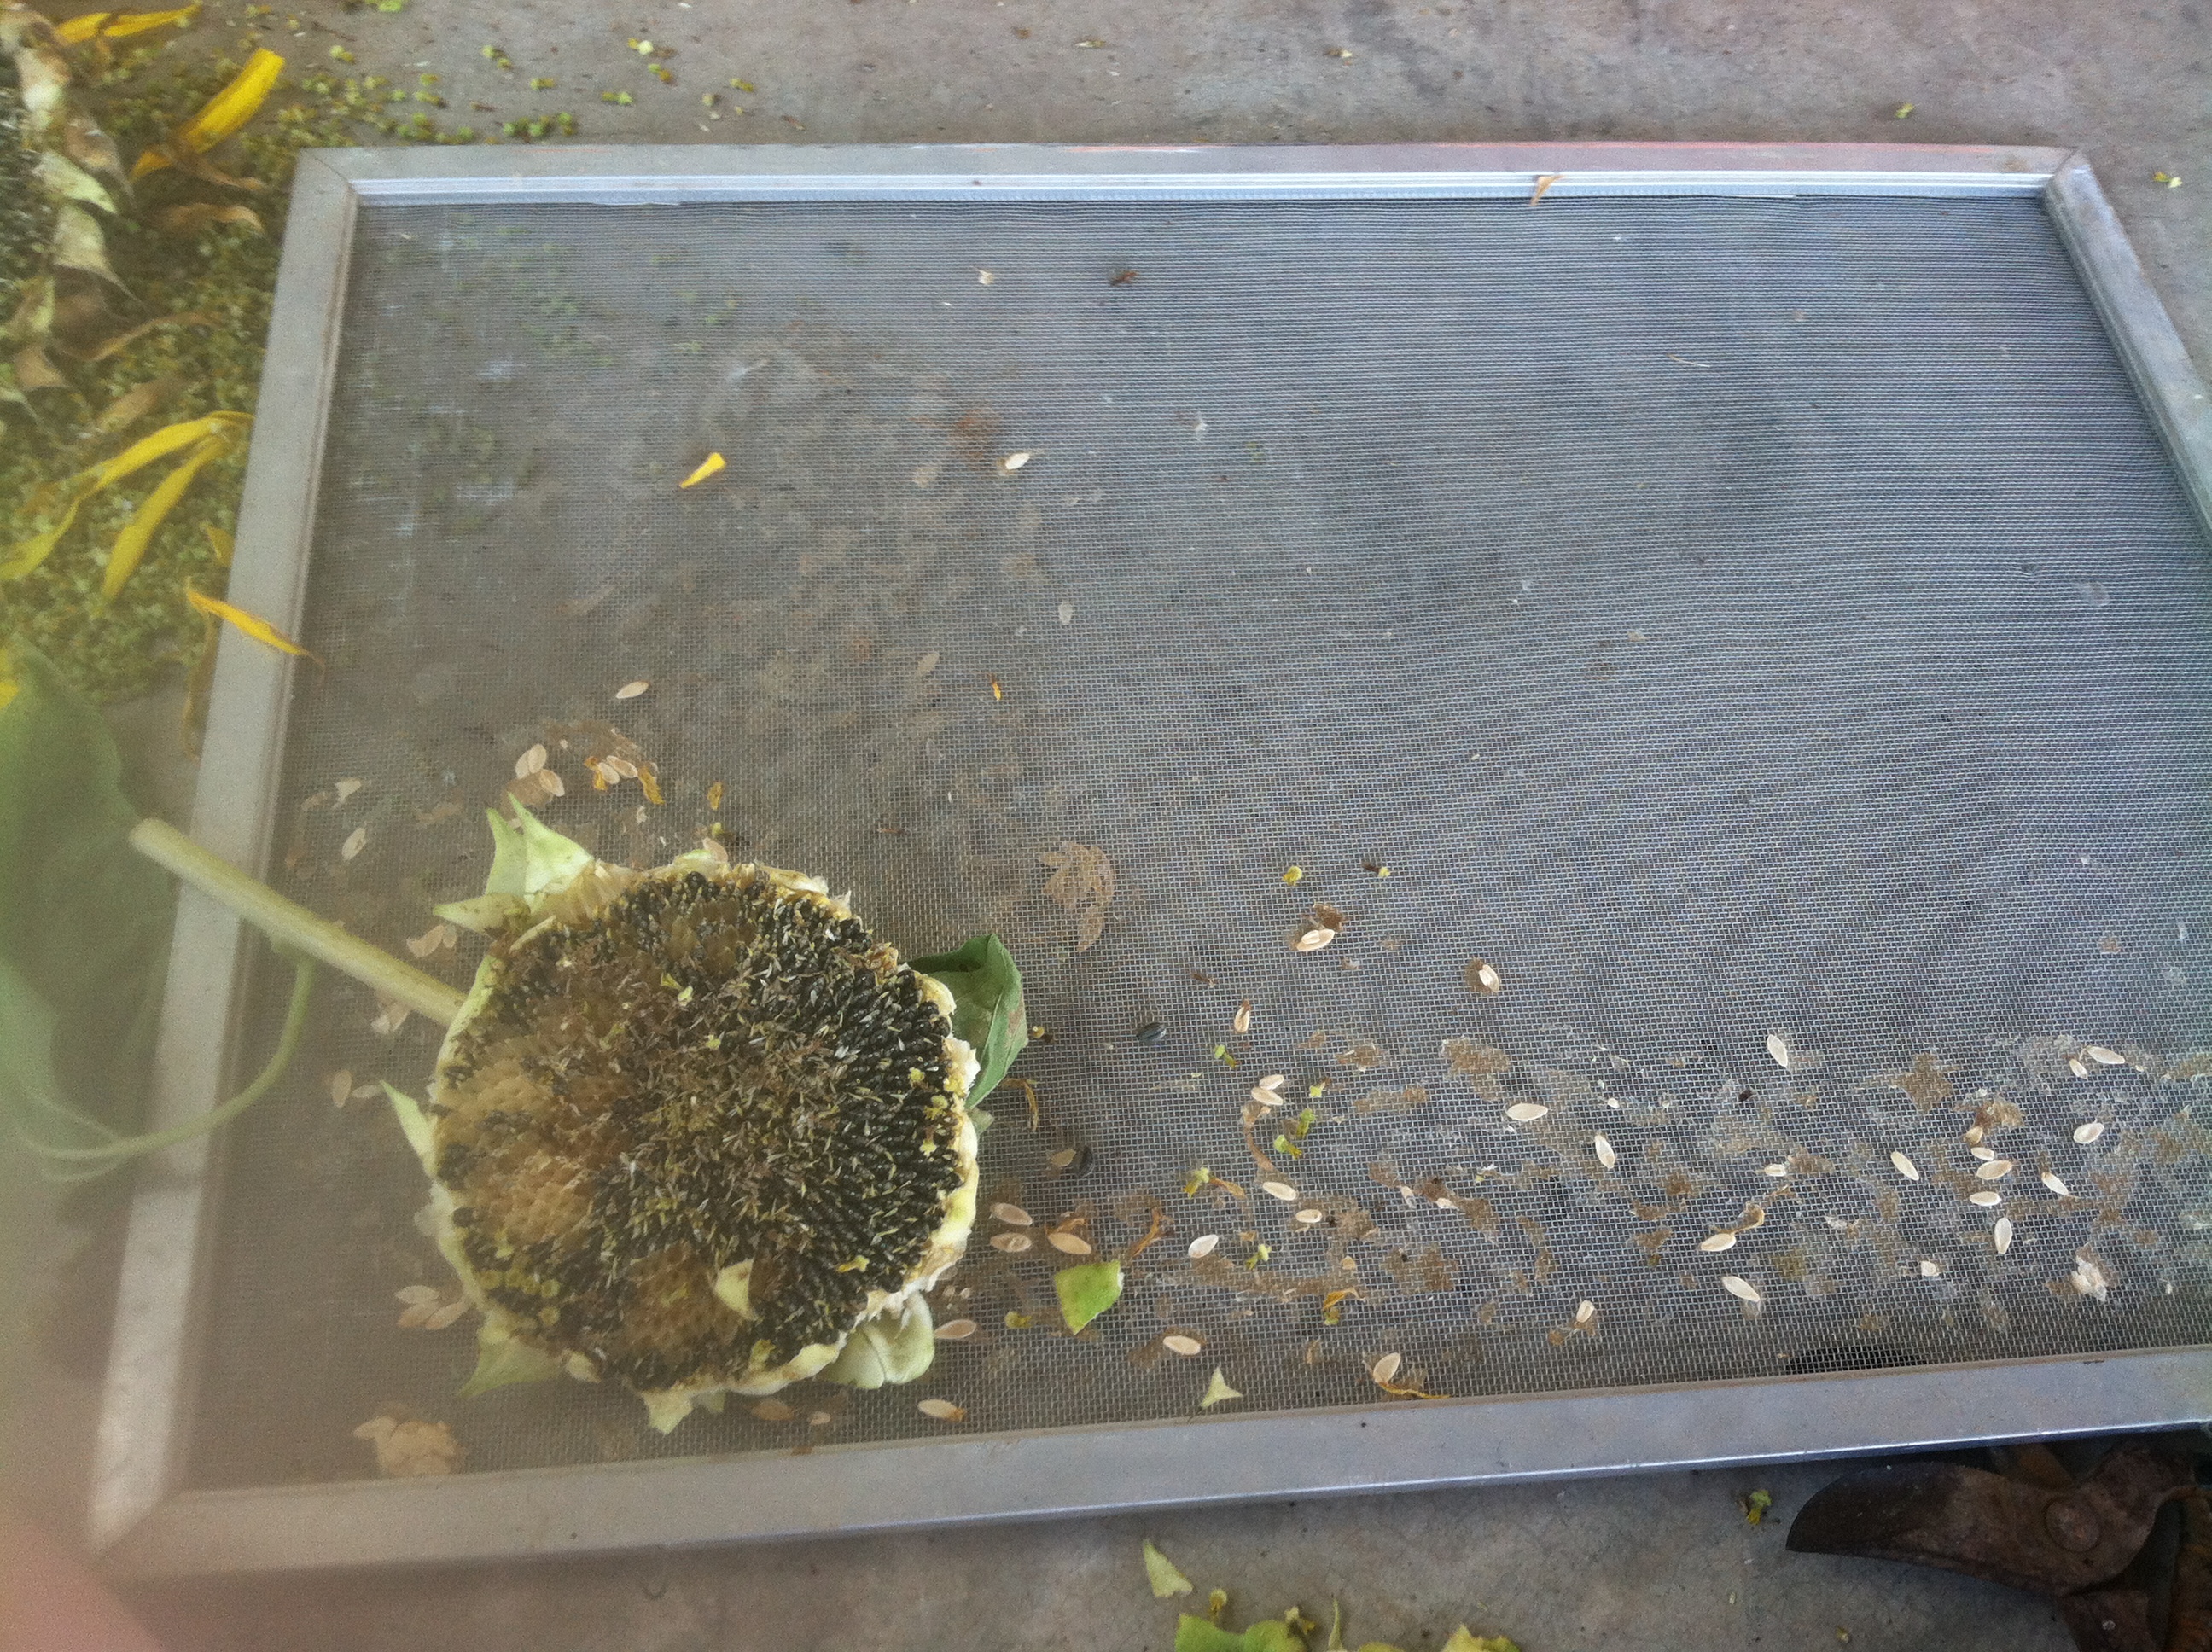
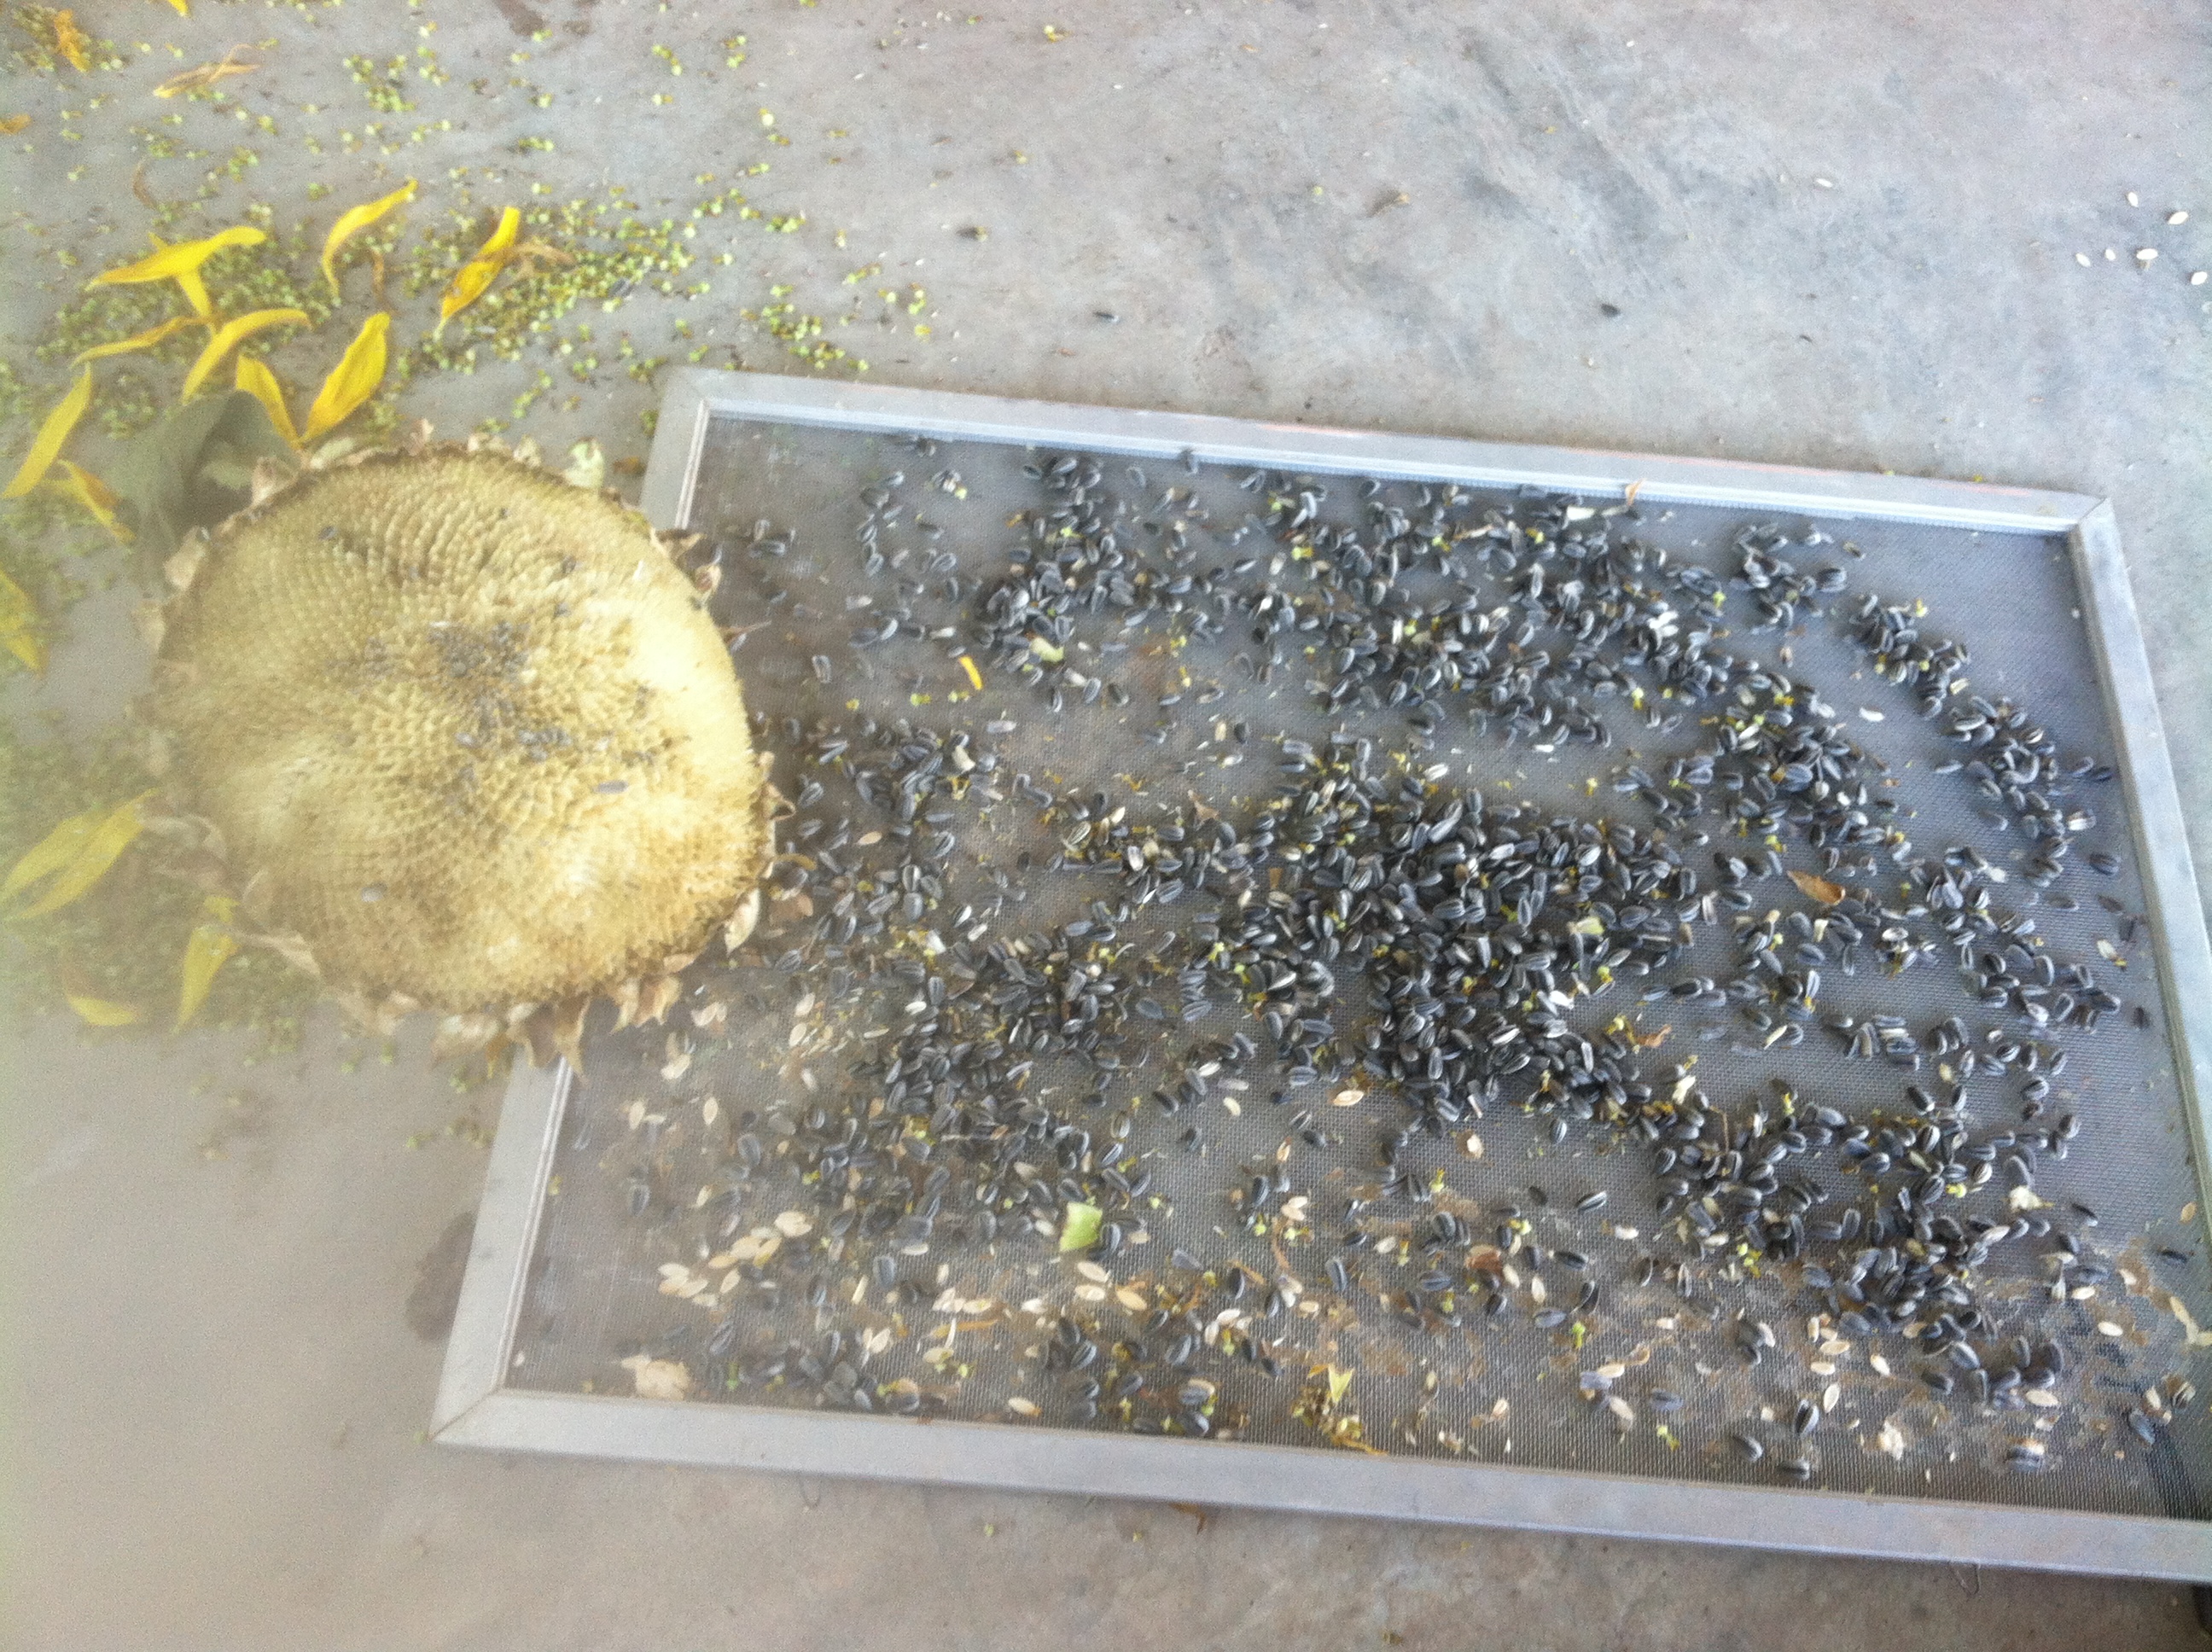
Use a screen (we used an old window screen) for drying the actual seeds.
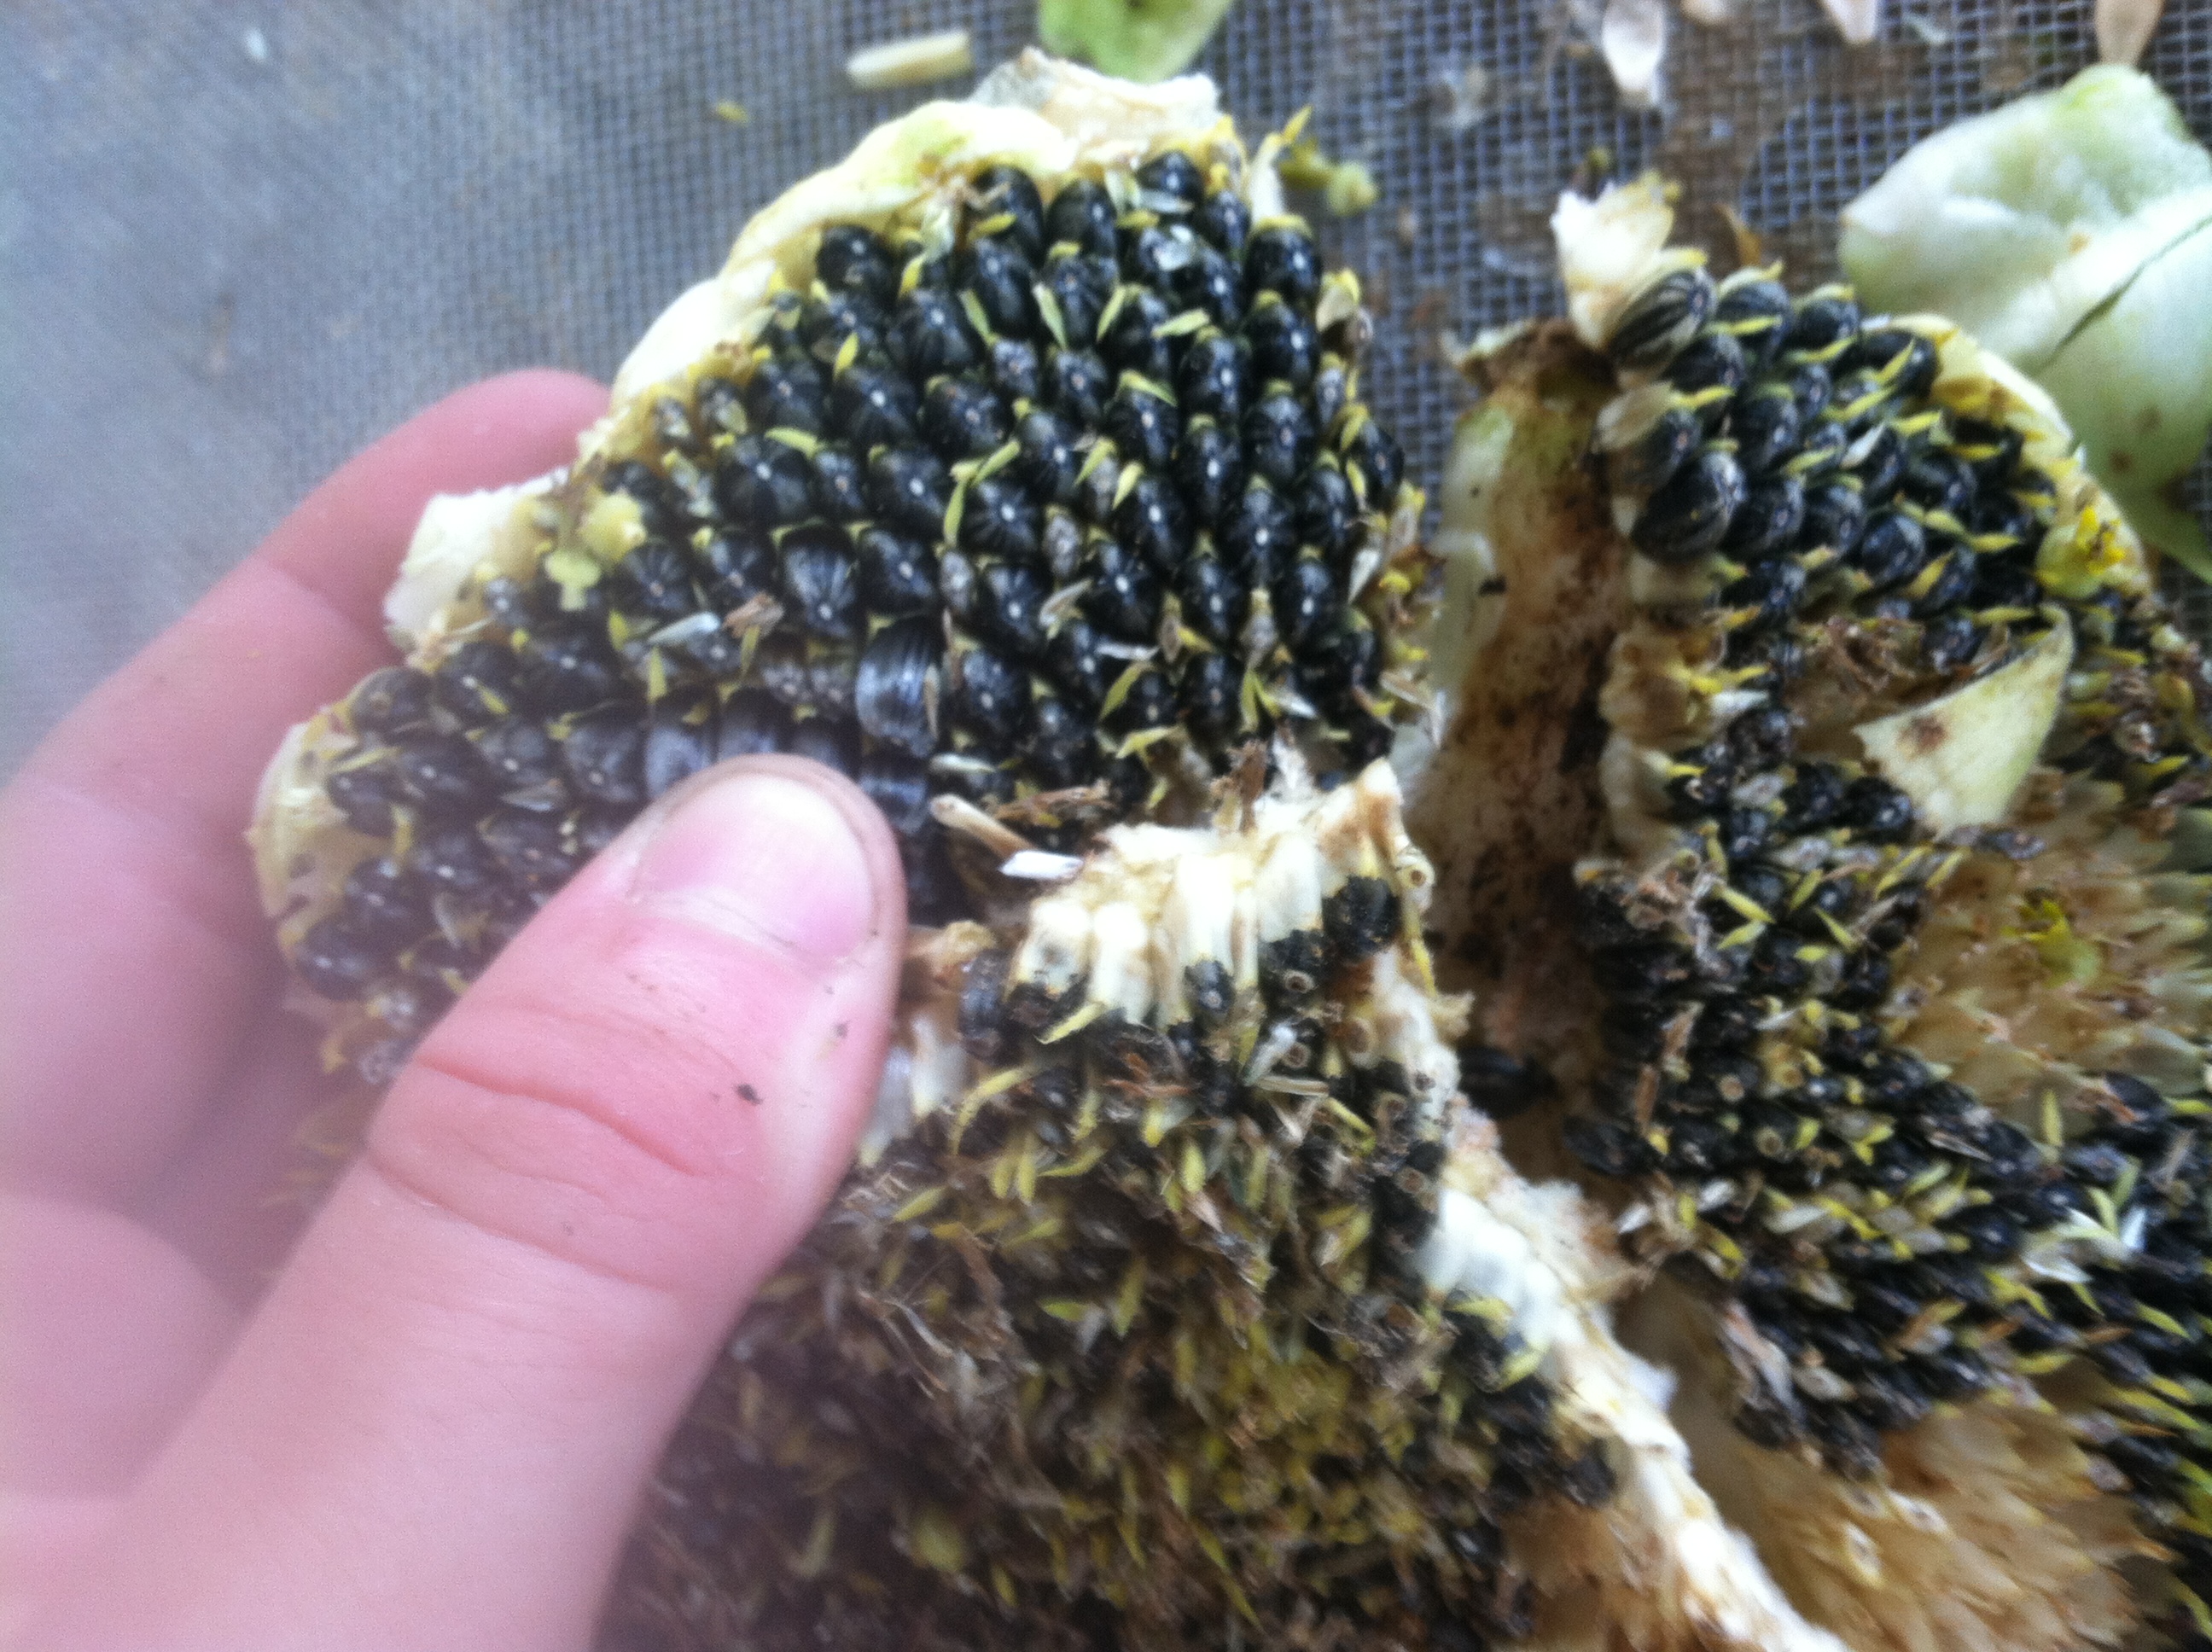
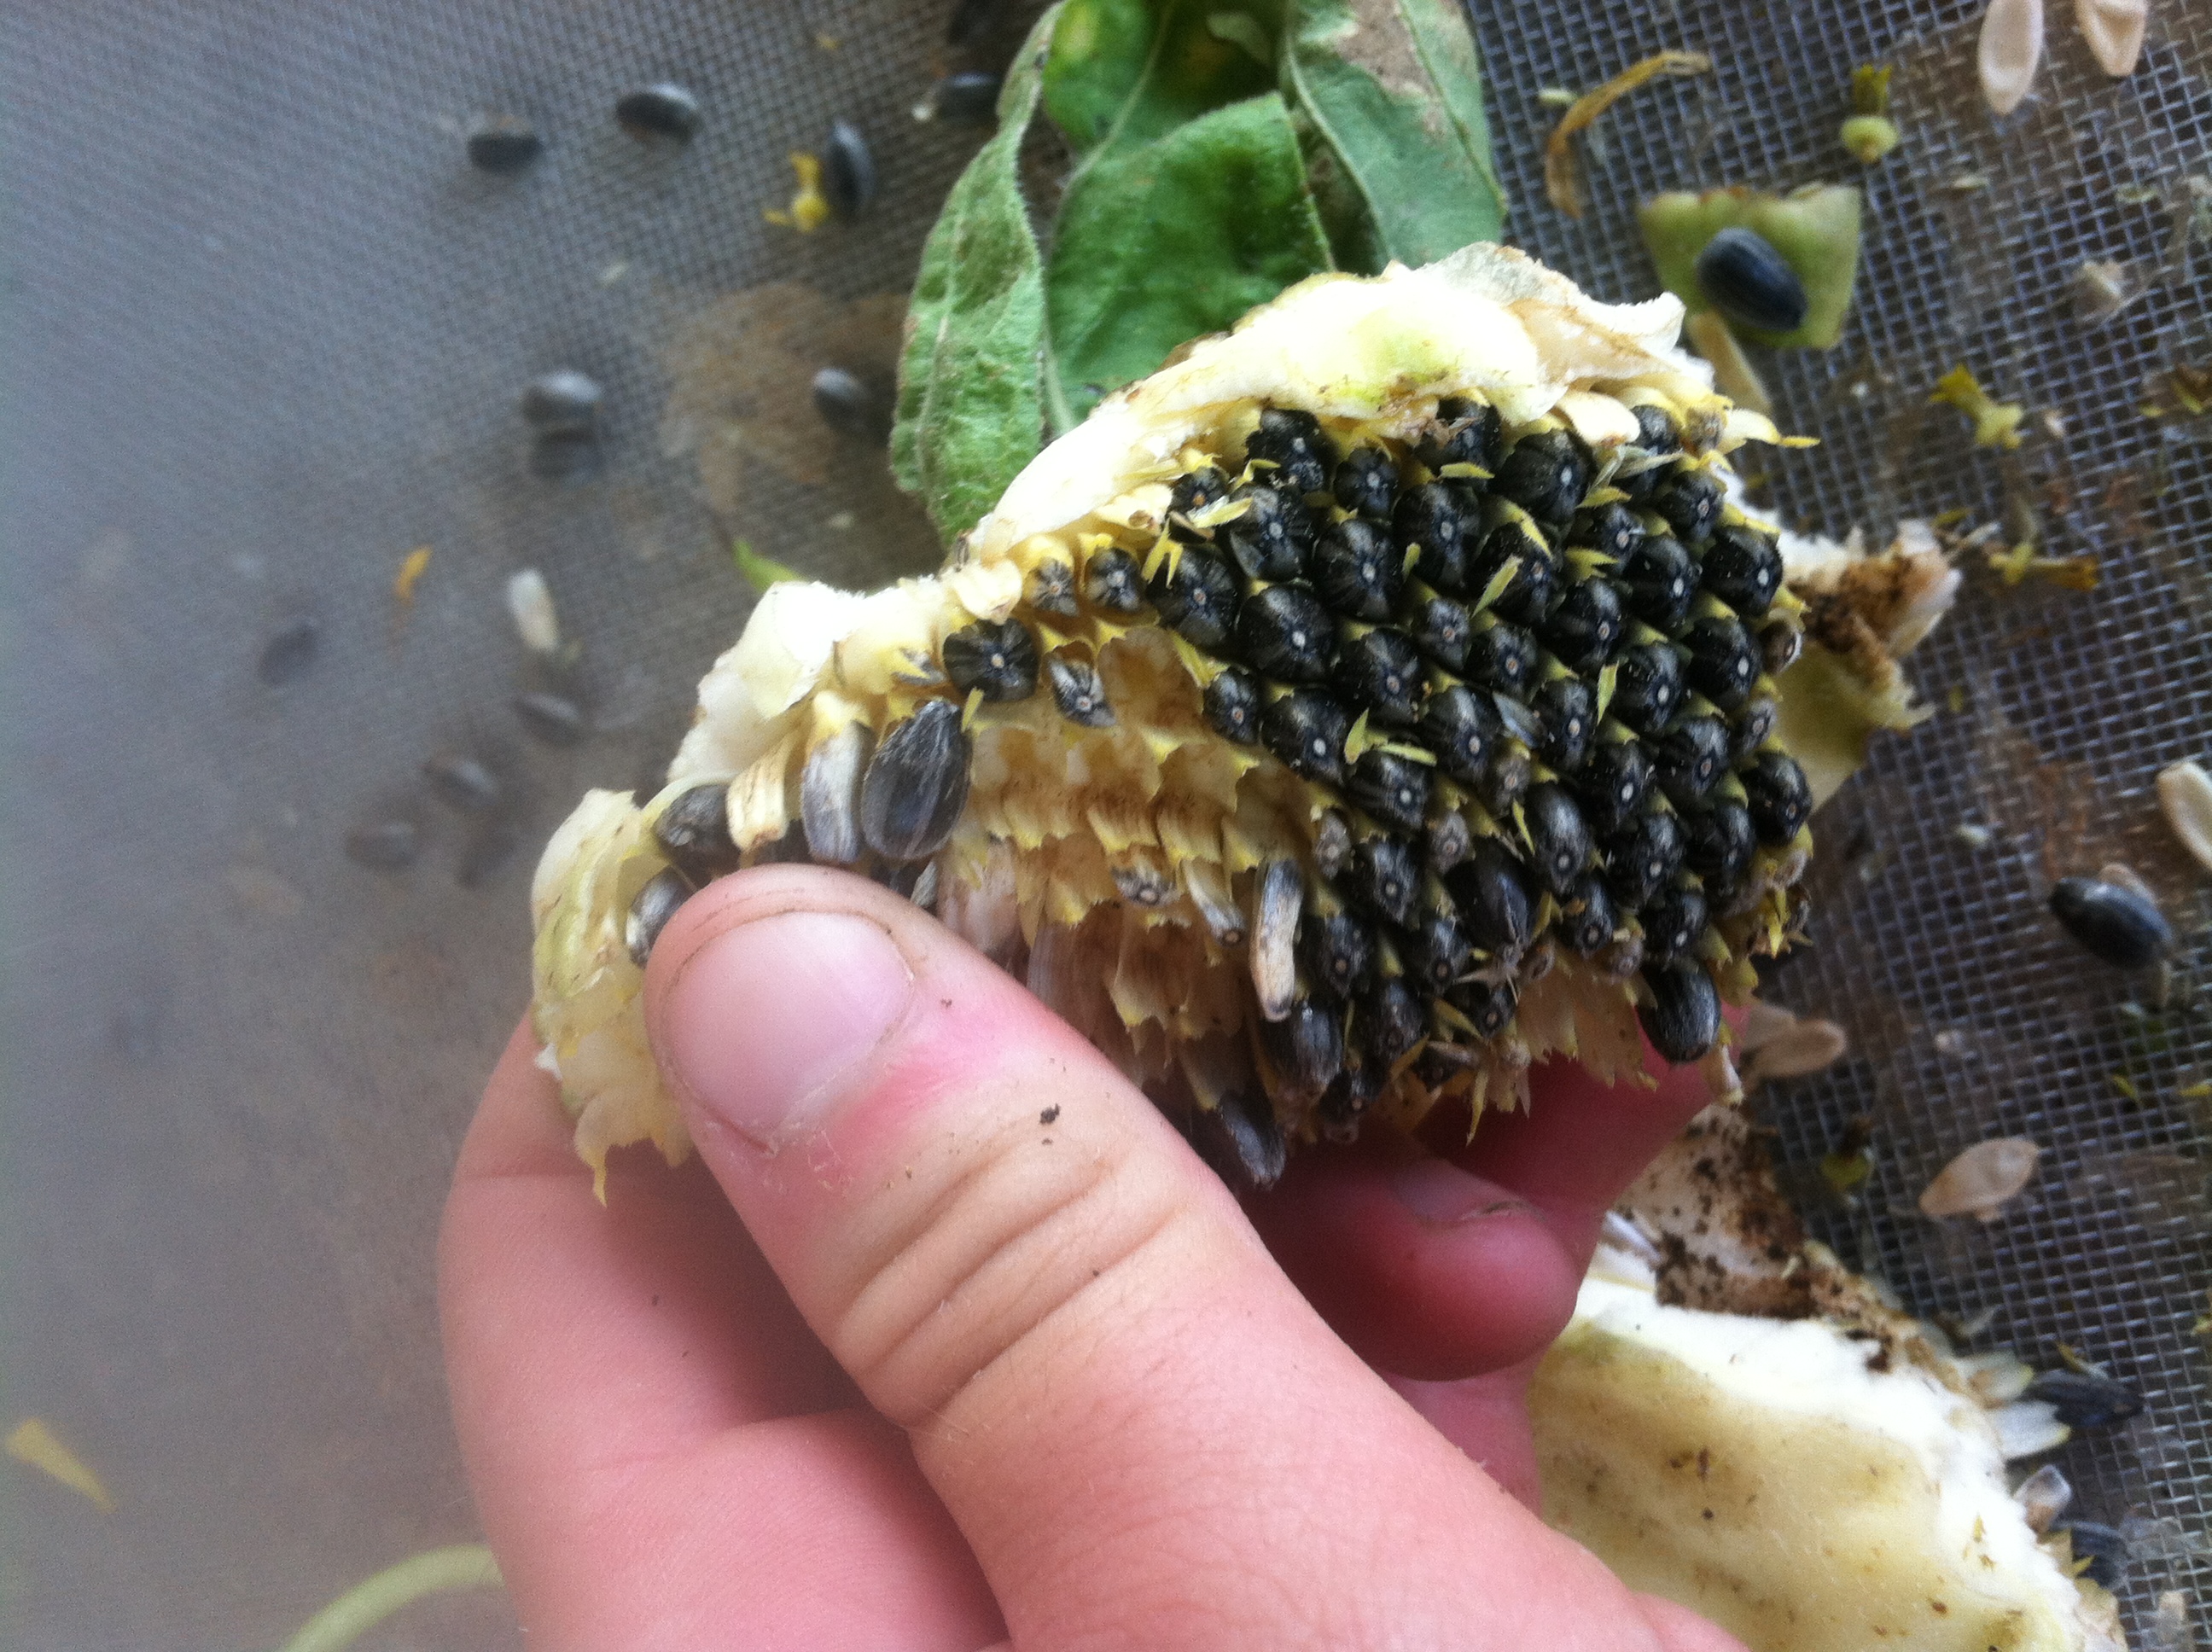
To take the seeds out of the head, break apart the head into sections and then rub your finger along the seeds so they pop out of their little holders. Make sure you have the screen underneath!
This is what it should look like after! Make sure you spread the seeds out evenly. Lay the seeds in a dry safe place for about two weeks. Test out the germination rate once dry to see if your seeds are good. You can take about 20-30 containers with one seed each and whatever comes up, divide that by your containers and that will be your germination rate!
Since last year I have been using the same recipe for controlling pests, mold, and plant eating substances.
The results have been the same in the end – healthy thriving plants! I thought I might share with y’all the recipe for my successful concoction!
Ingredients and Supplies:
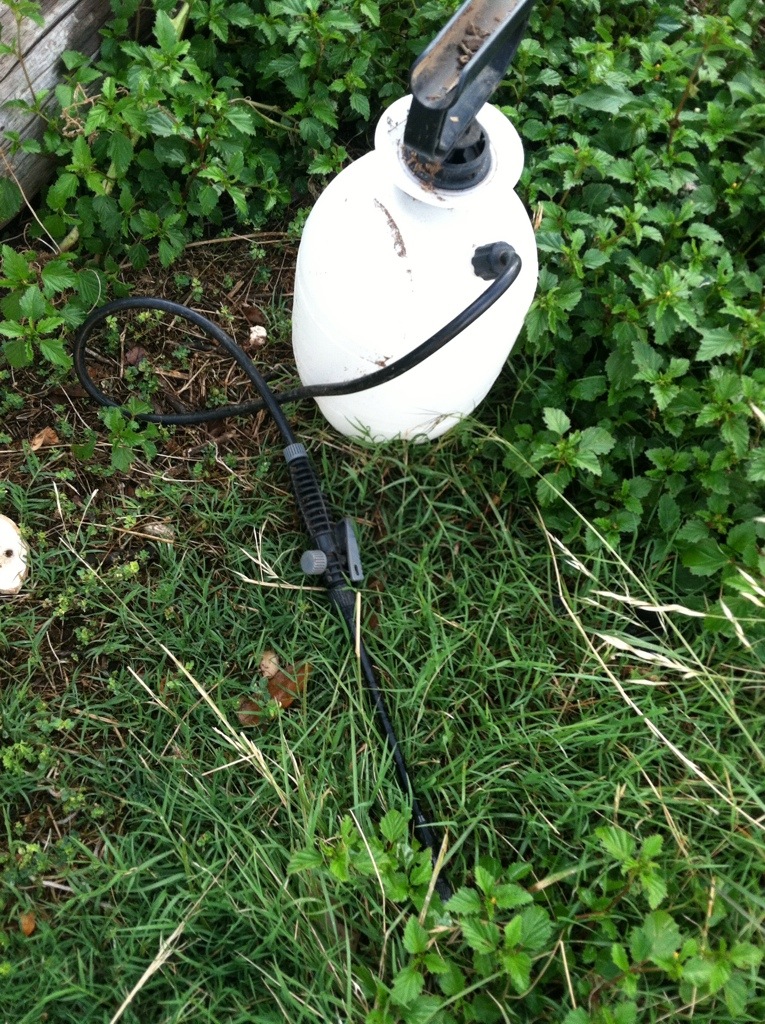
2 tsp orange oil or orange extract 3 tbsp vinegar 2-3 drops of dish soap Water 1 gallon sprayer
Mix all of the ingredients in the gallon sprayer and there you go! Spray away! Spray on top and underneath leaves for bugs and the infected areas as a herbicide.
Orange oil is a natural killer of bugs and fungi/molds. If it does not work, increase the vinegar or orange oil until it works – but don’t use too much of either because they can hurt your plants if not diluted into a low concentration form. You will need to inspect plants and continue treatment – usually 1 to 2 weeks of every day use as a herbicide and an application once every 1 to 4 weeks for a pesticide depending on the bug. It depends on the severity in your garden.
This concoction worked very well last year on squash plant leaf molds.
Below is the sprayer I use, and the bug infected plants I sprayed today! The bugs fell right off after spraying.
Poor plant that got eaten by bugs!
Bug infested plant!
I hope that this concoction will help others in their organic gardens! I believe in making sure my family is as healthy as possible and try to inform others to help them on their paths to good health as well!
Make sure that you wash your produce from whatever excess soap residue…
I went to the store to purchase some new heirloom varieties for transplanting into the new big garden my uncle tilled for me. They are supposed to be purple and there are some that are interesting shapes and sizes. I also planted some of the Organic “Big Boy” Tomato seeds I bought a few years back into a covered pallet. They grew huge! They overflowed out of the container and all I used was normal potting soil and kept it moist.
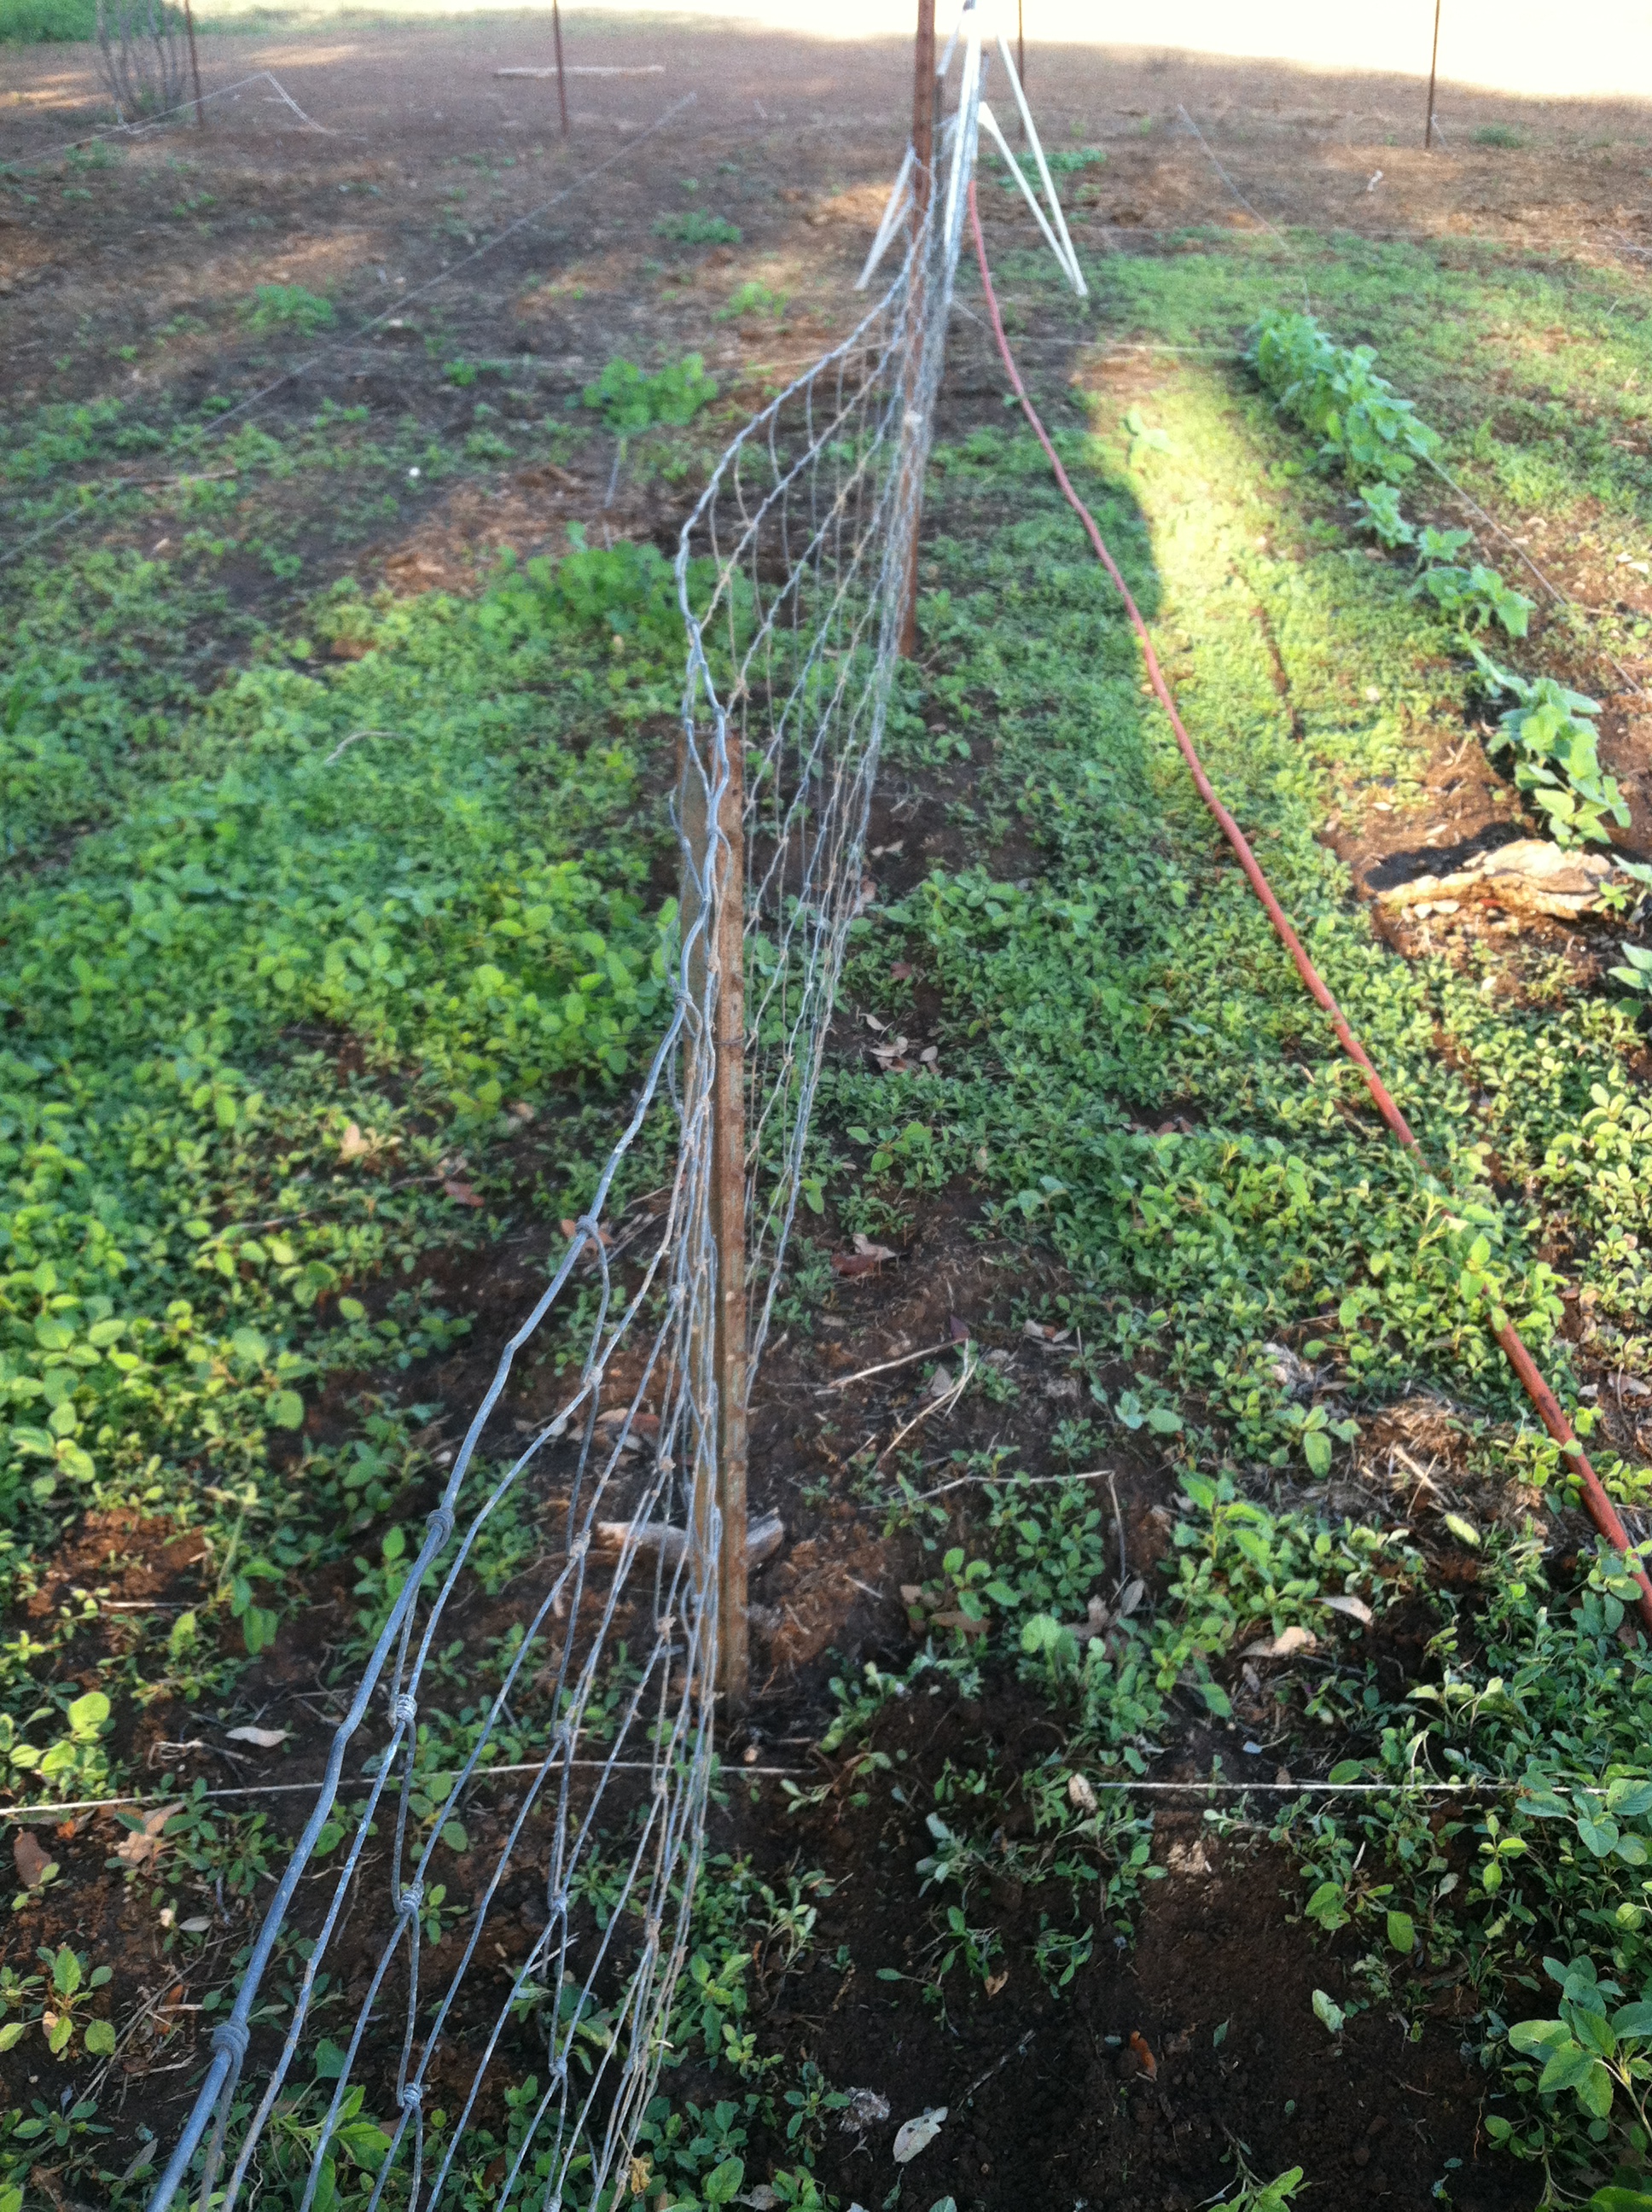
Anyways – all of these plants needed transplanting with some fertilizer onto the newly fenced area I had made for them. I thought I should inform you of how I did it because now they are growing lots of tomatoes 3 weeks later!
Here is how I transplanted my tomatoes this year and I will keep adding pictures through out the season so we can all see the progress of their growing! Planted April 6, 2014.
First, I let the garden go a little bit…. oops. I had to weed the part I wanted to put the tomatoes in.
Before – a weed bed!
After – a nice clean bed for planting.
This tool is great for weeding – it goes below the roots and plucks them out.
My most favorite tool! The weederrrrrr.
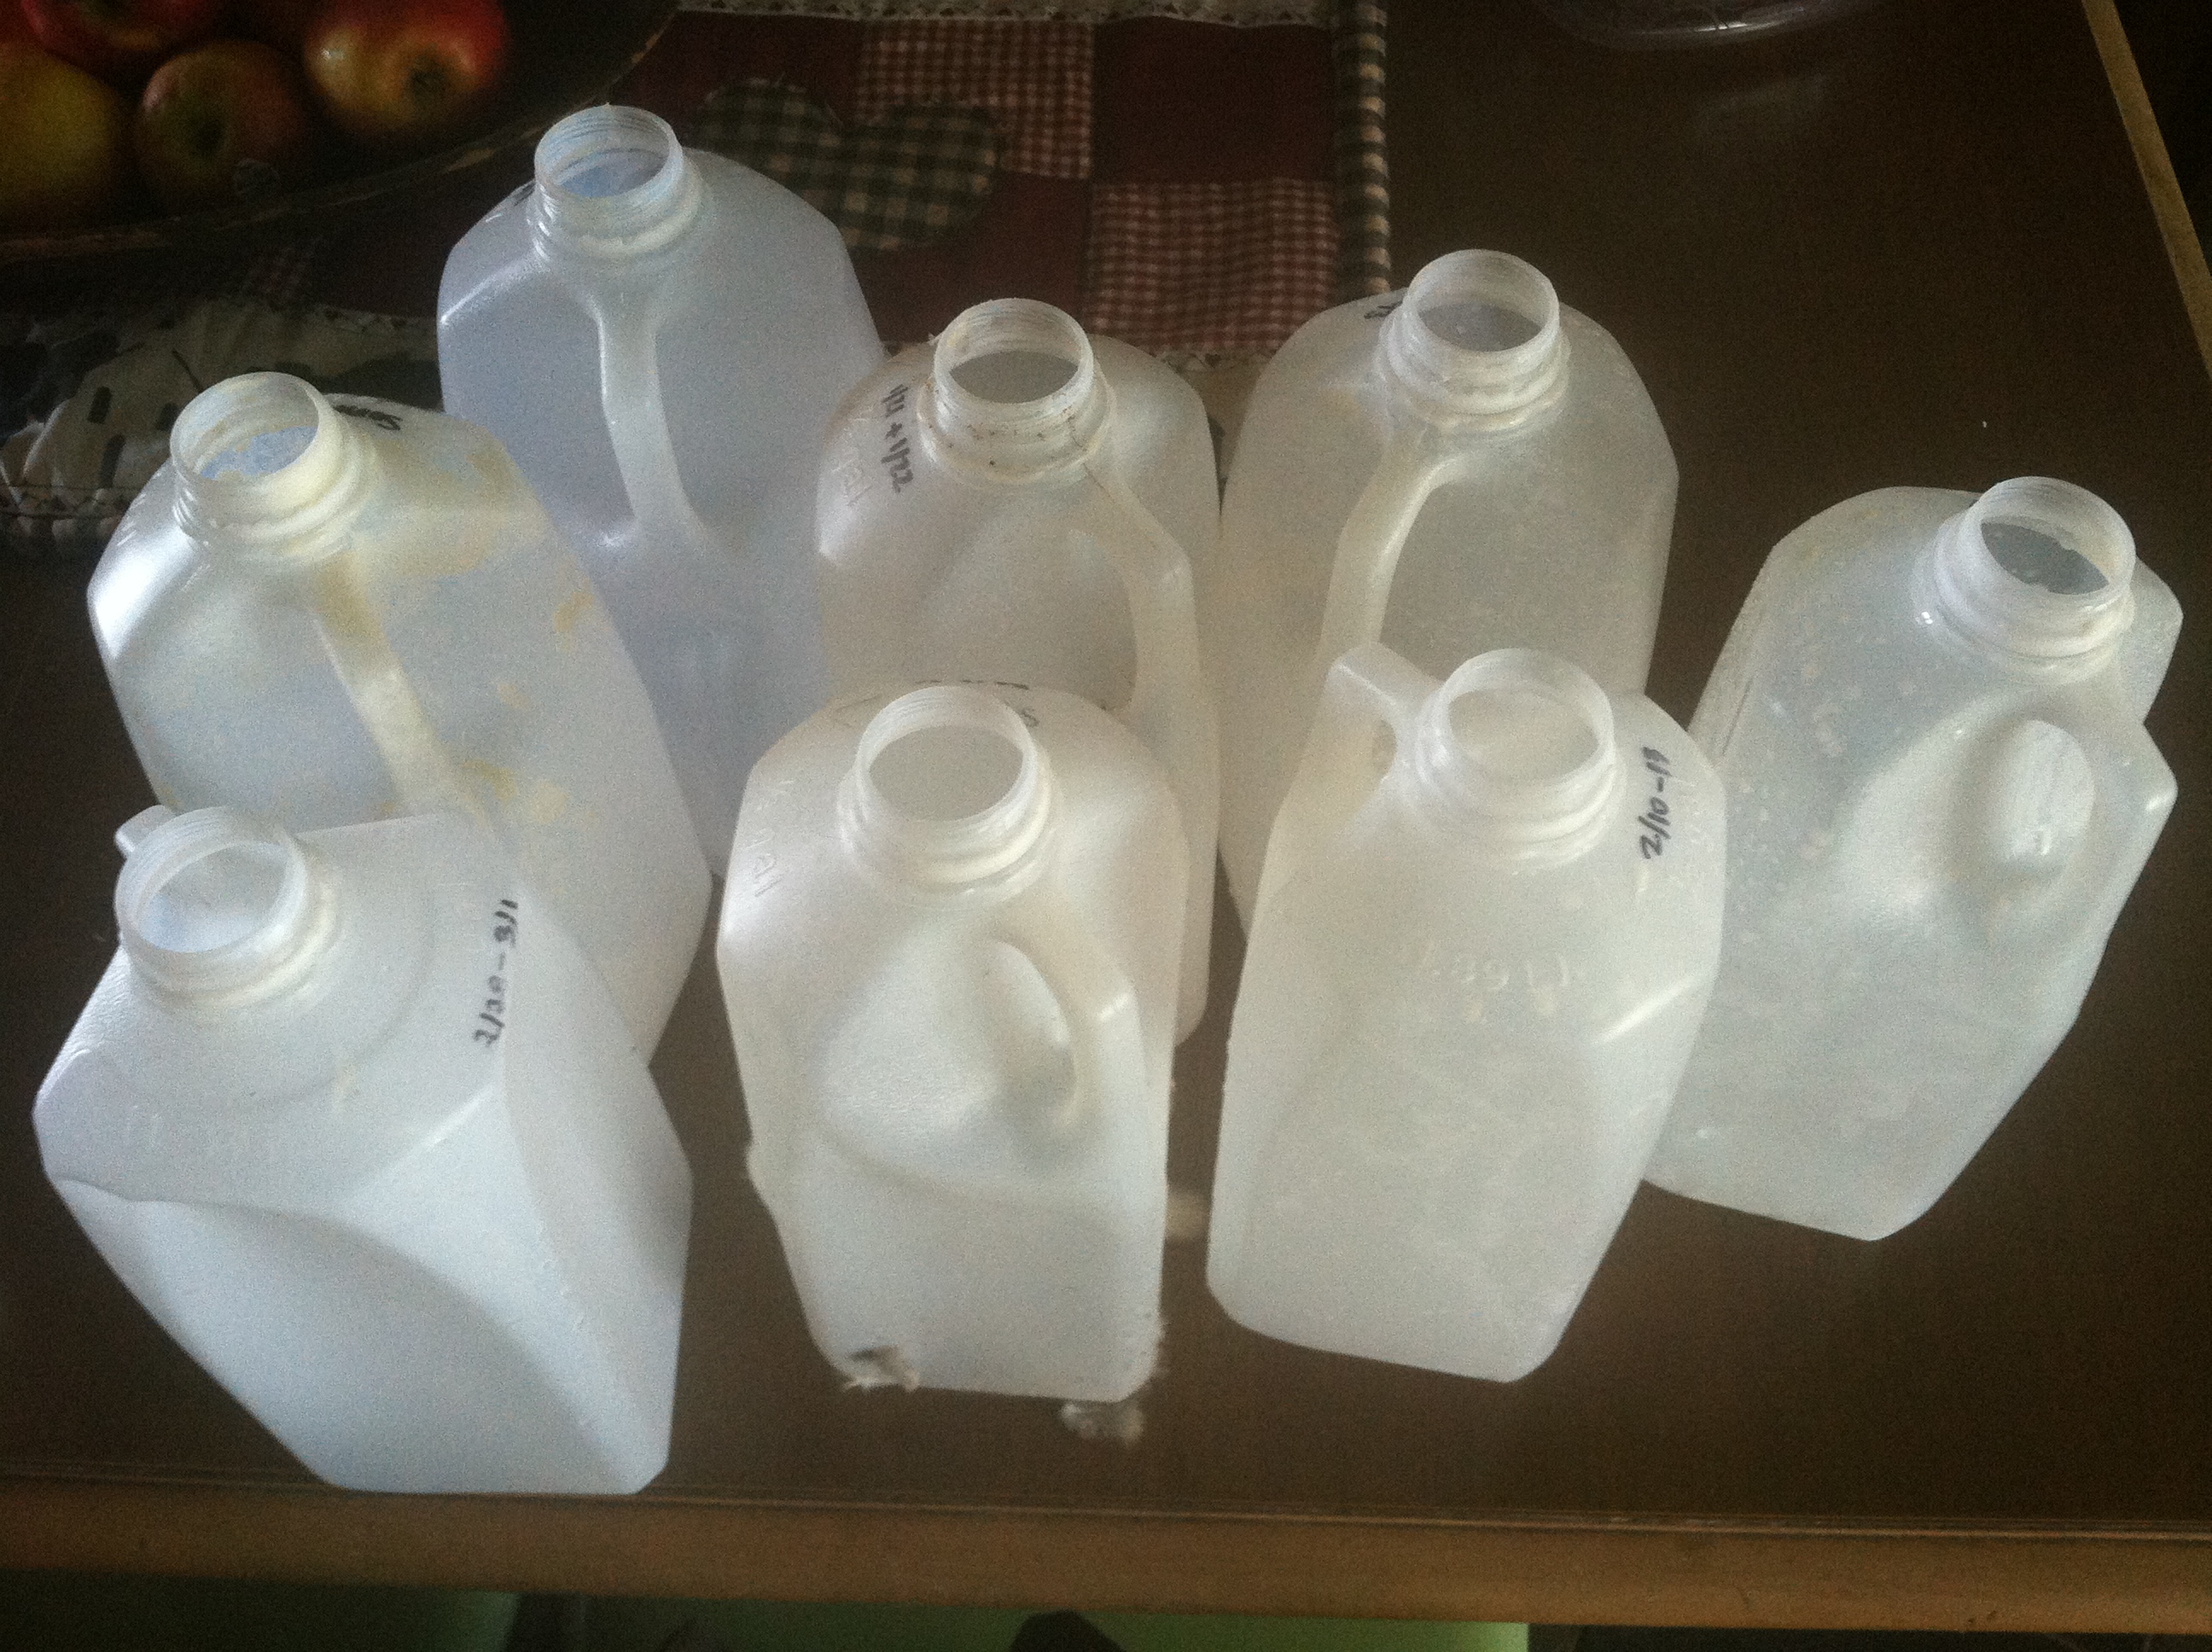
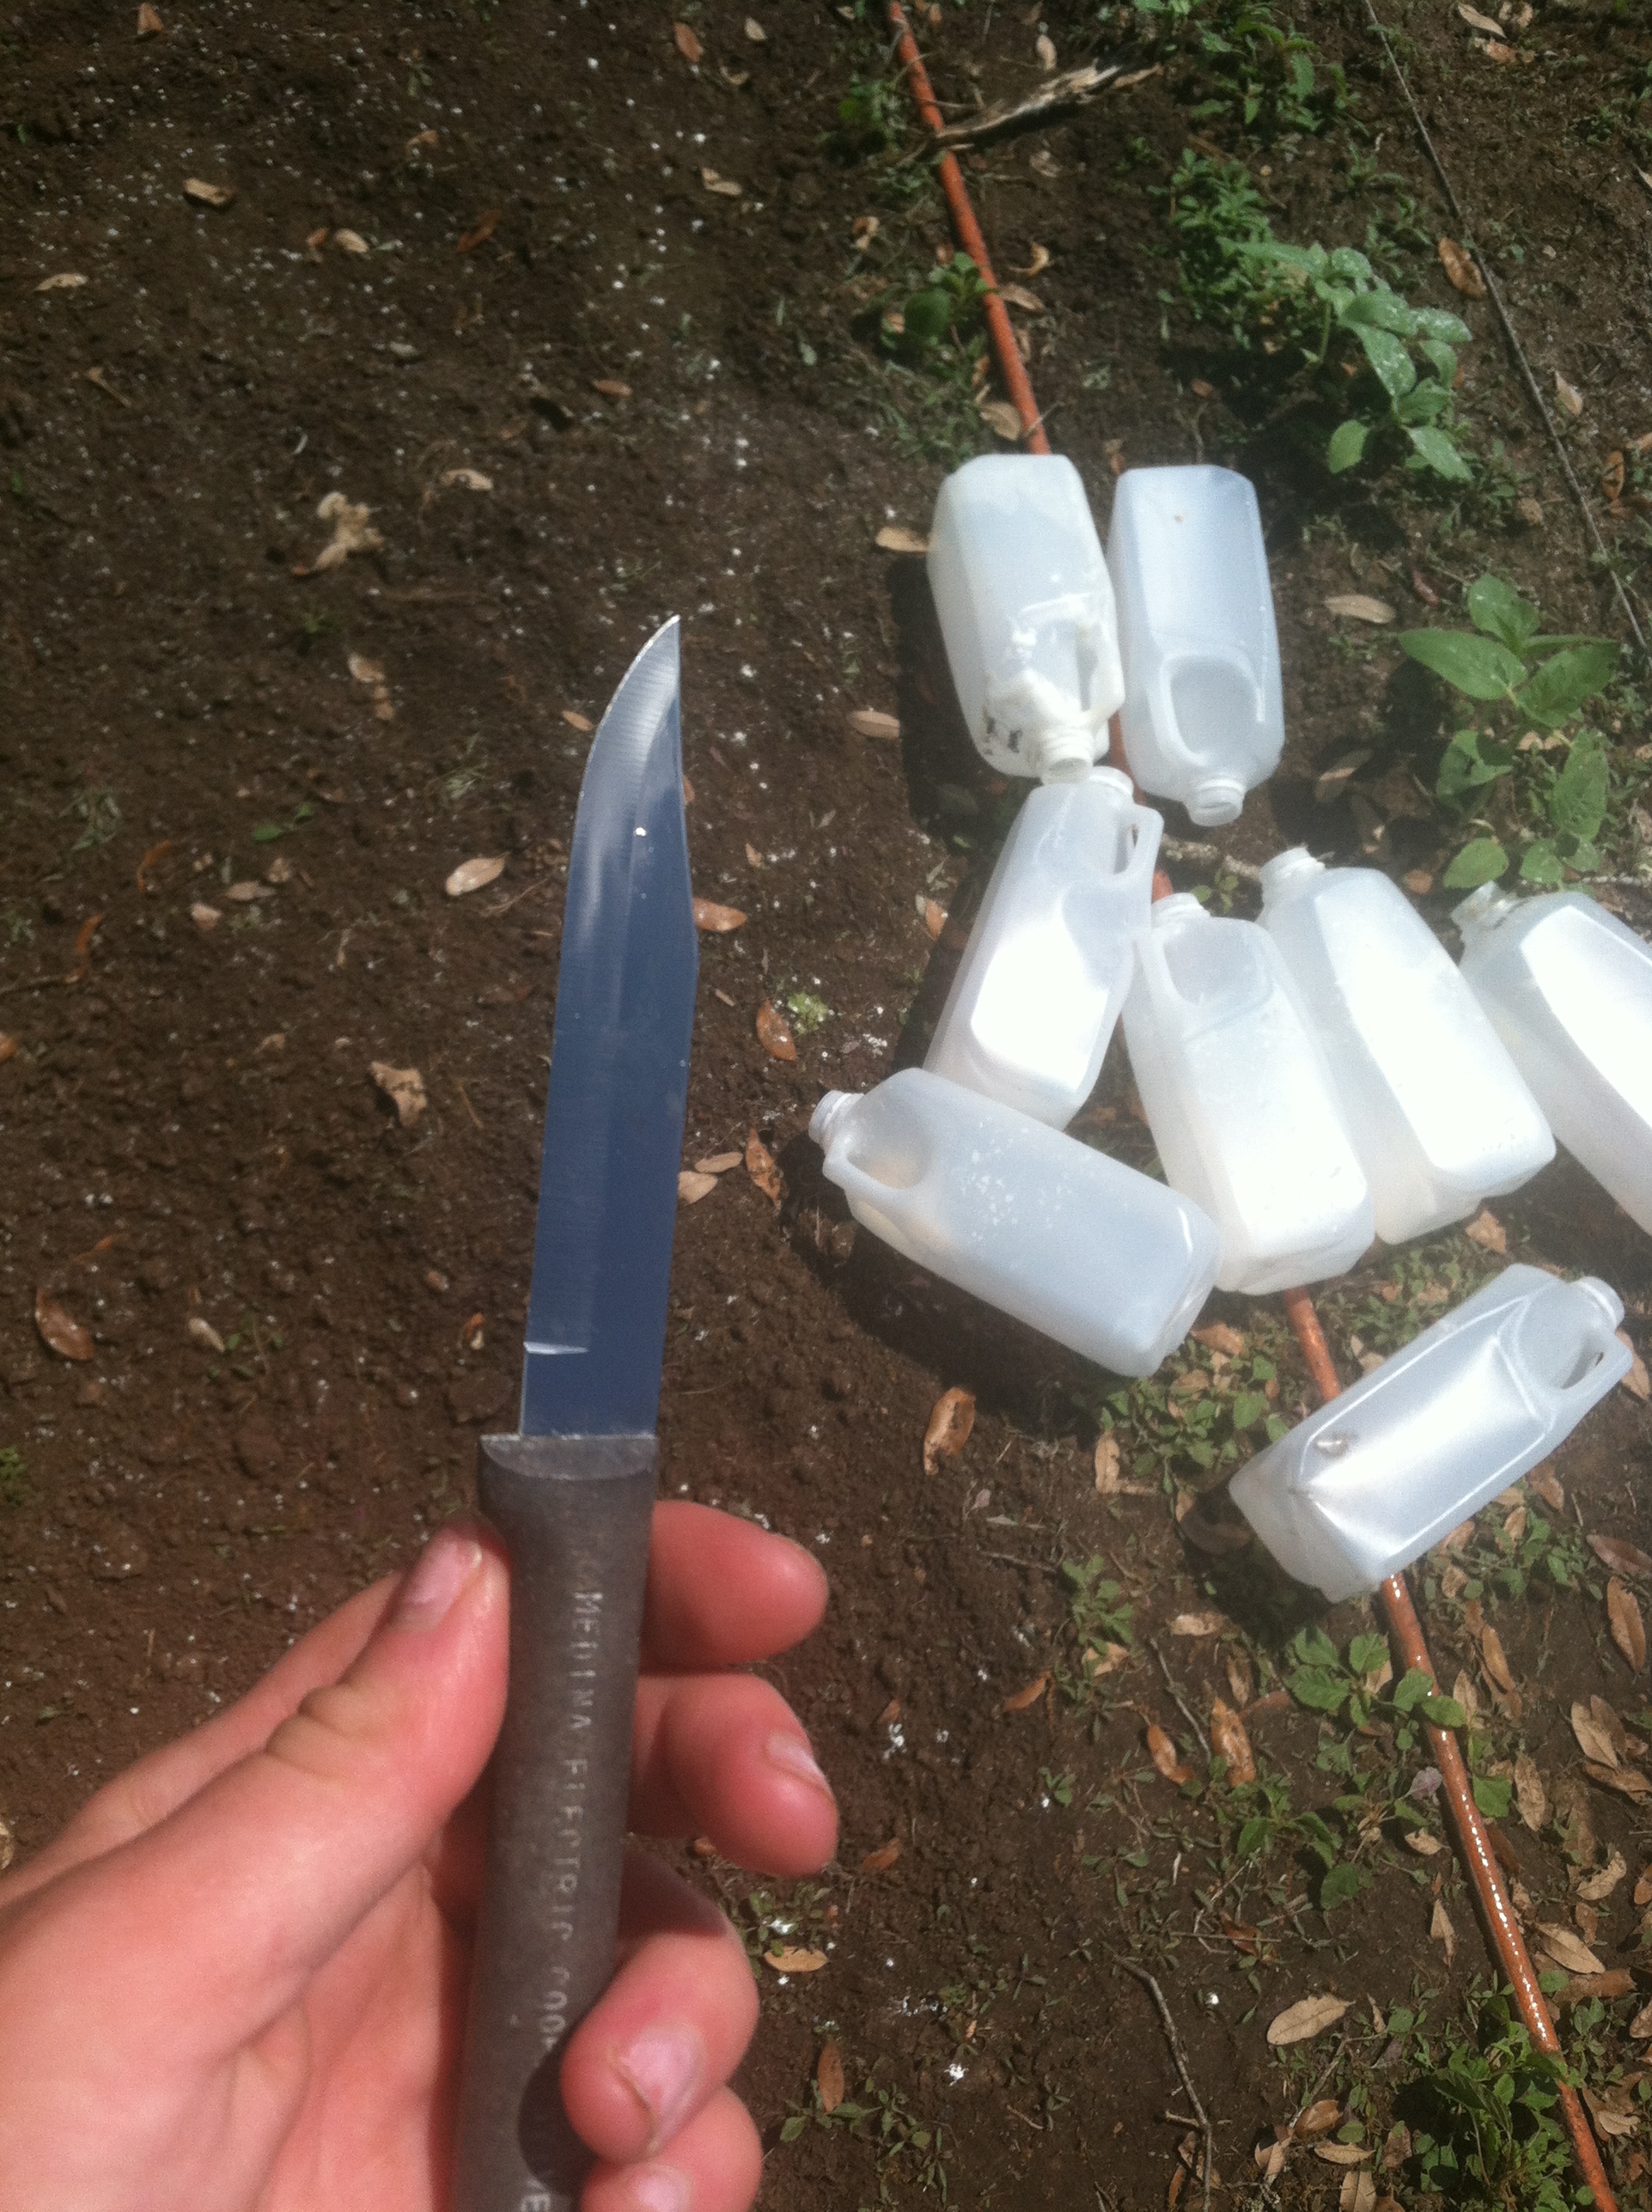
After all that weeding and sweating… I gathered my materials. I love recycling materials so I used my old milk jugs from storing soap milk and some rabbit pellets (tomatoes LOVE rabbit poo). I also used a sharp knife. You will see why in a little bit. I did not clean out my jugs because plants apparently love milk whenever it is diluted and poured in the garden. Thought I might give the transplants some treats.
Old Milk Jugs
Fertilizer
I have heard a lot of good things about the ancient practice of using pottery under ground to wick water off into the soil when it becomes dry. In the summer months tomatoes need tons of water and they don’t always get it whenever they get their normal watering. I had the idea to make my own wicking system for each plant to get extra water using the milk jugs. It is fairly simple – just make sure that you are careful!
So I took my sharp little pairing knife…
And poked tons of holes in the jugs exept for the top and bottom.
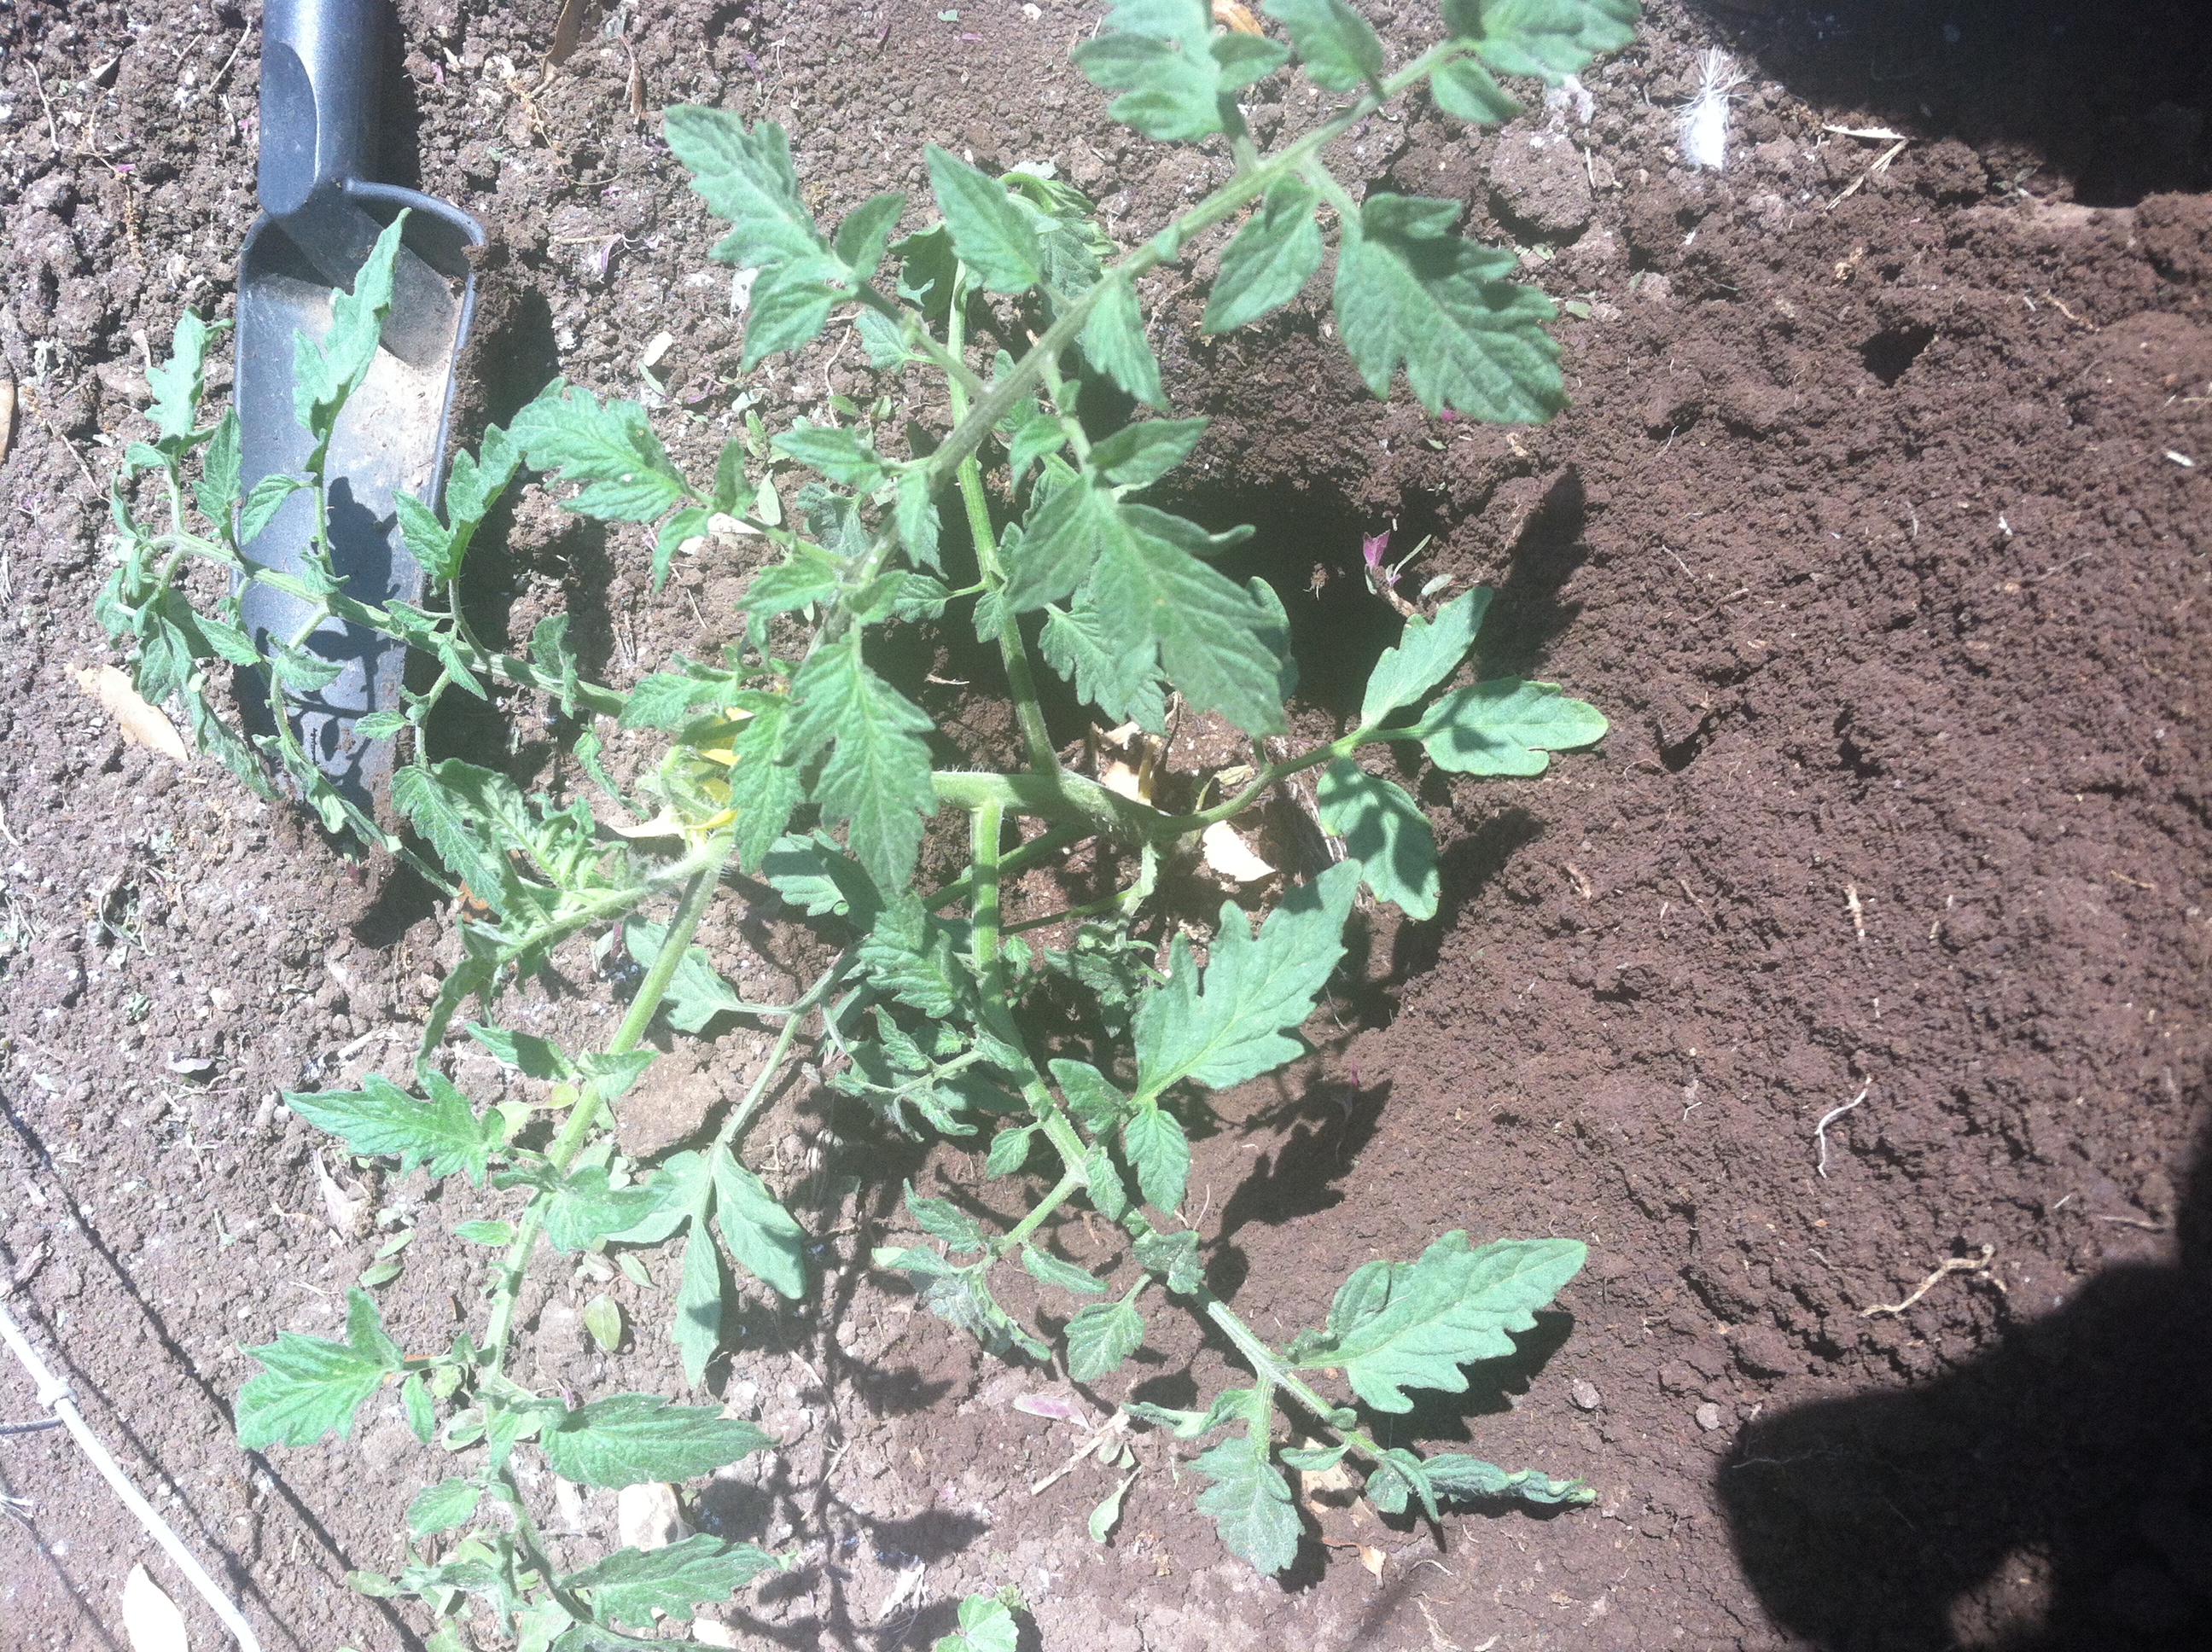
Then I dug a hole big enough to put the plant in with extra fertilizer – tomatoes like being planted to where some of the stem is covered so that they can get adequate stabilization. I put the rabbit fertilizer straight into the hole.
I put the plant in the hole and then packed the soil in around the plant. They like being snug.
I then proceeded to plant all the rest the same way- making sure that there was enough room inbetween the plants – they get pretty big whenever they are full grown fertilized bushes.
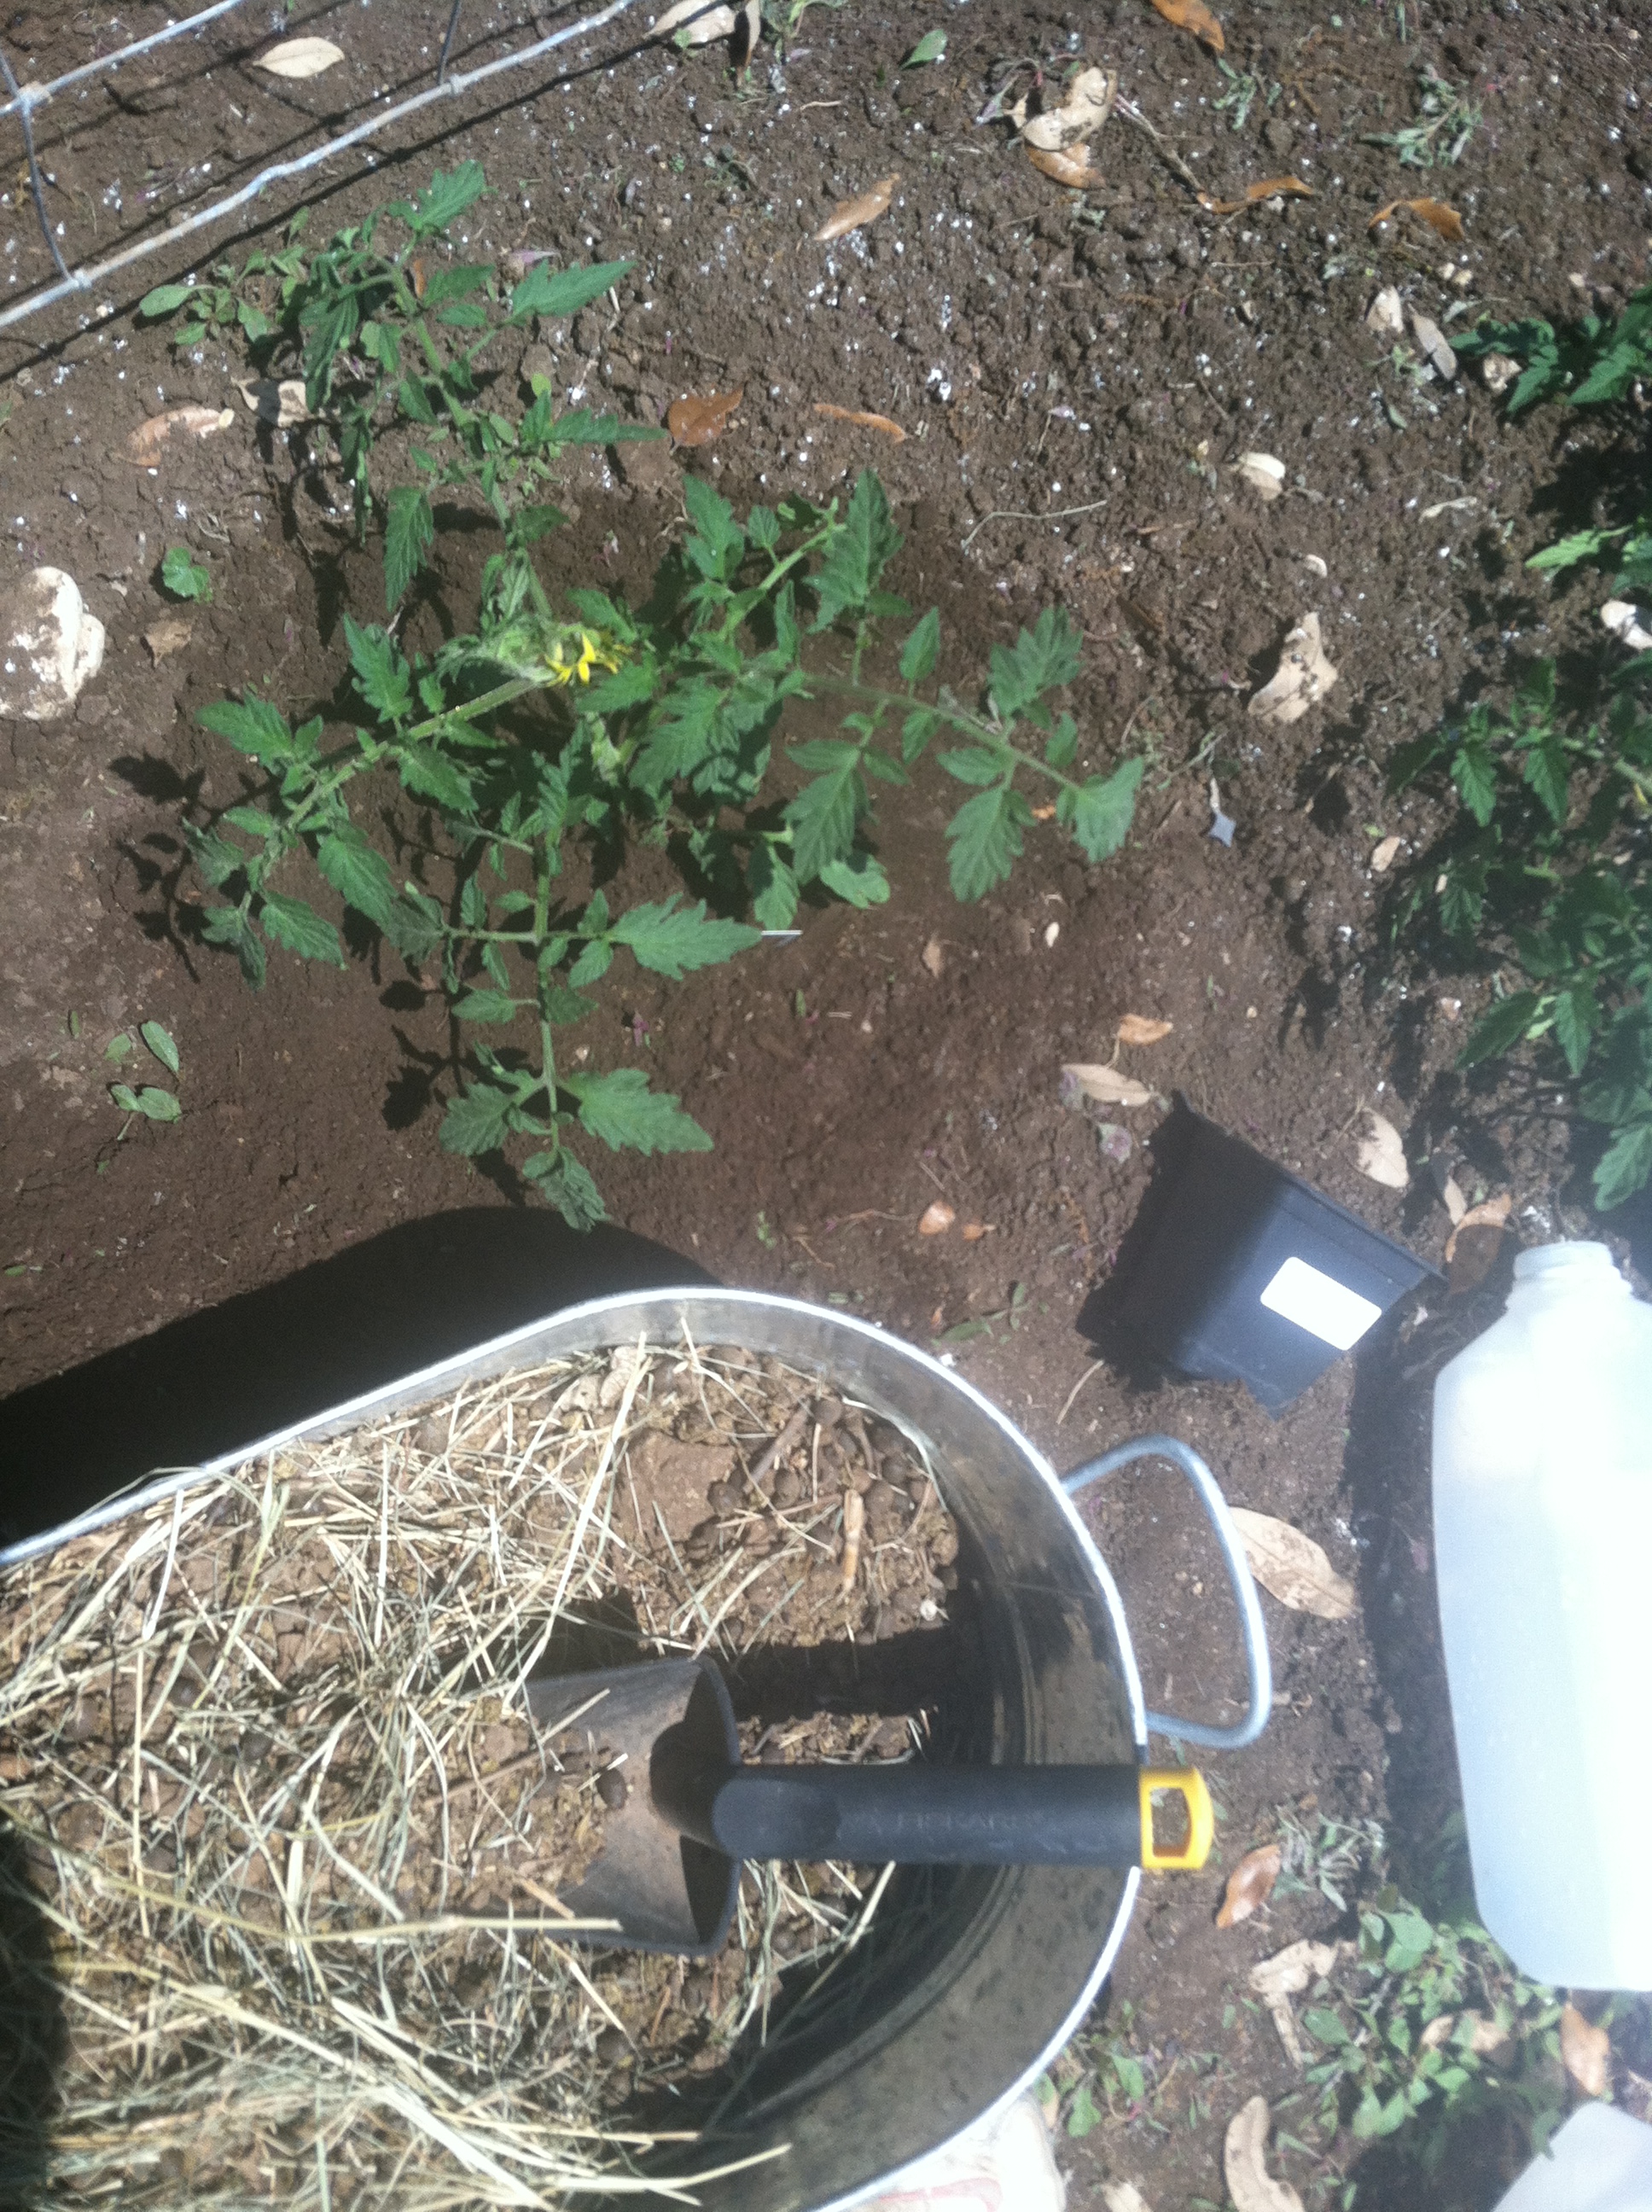
I dug down after right by the plant to where the jug could fit in but the jug opening and about 2″ was sticking out. That way the water could be inserted without foreign material getting in and blocking the waterway to the plant.
The end result looked like this:
And that is how I planted my tomato plants. Updates will come soon on how they have done! Date of planting: April 6 ,2014.
Update: August 18, 2014
The tomato plants are pretty huge and are producing tons of tomatoes! Next year I need to find something to control pests from biting the fruit – making it all splotchy looking and hard.
The purple heirloom tomatoes did not make it through. They only lasted about 4 weeks and died off. Cause of death: Unknown.
Overall – got plenty of tomatoes around August/September before the first frost. Need to transplant a lot earlier! Will have a greenhouse in 2015 so we shall see how it will go! Super excited for the next growing season.